
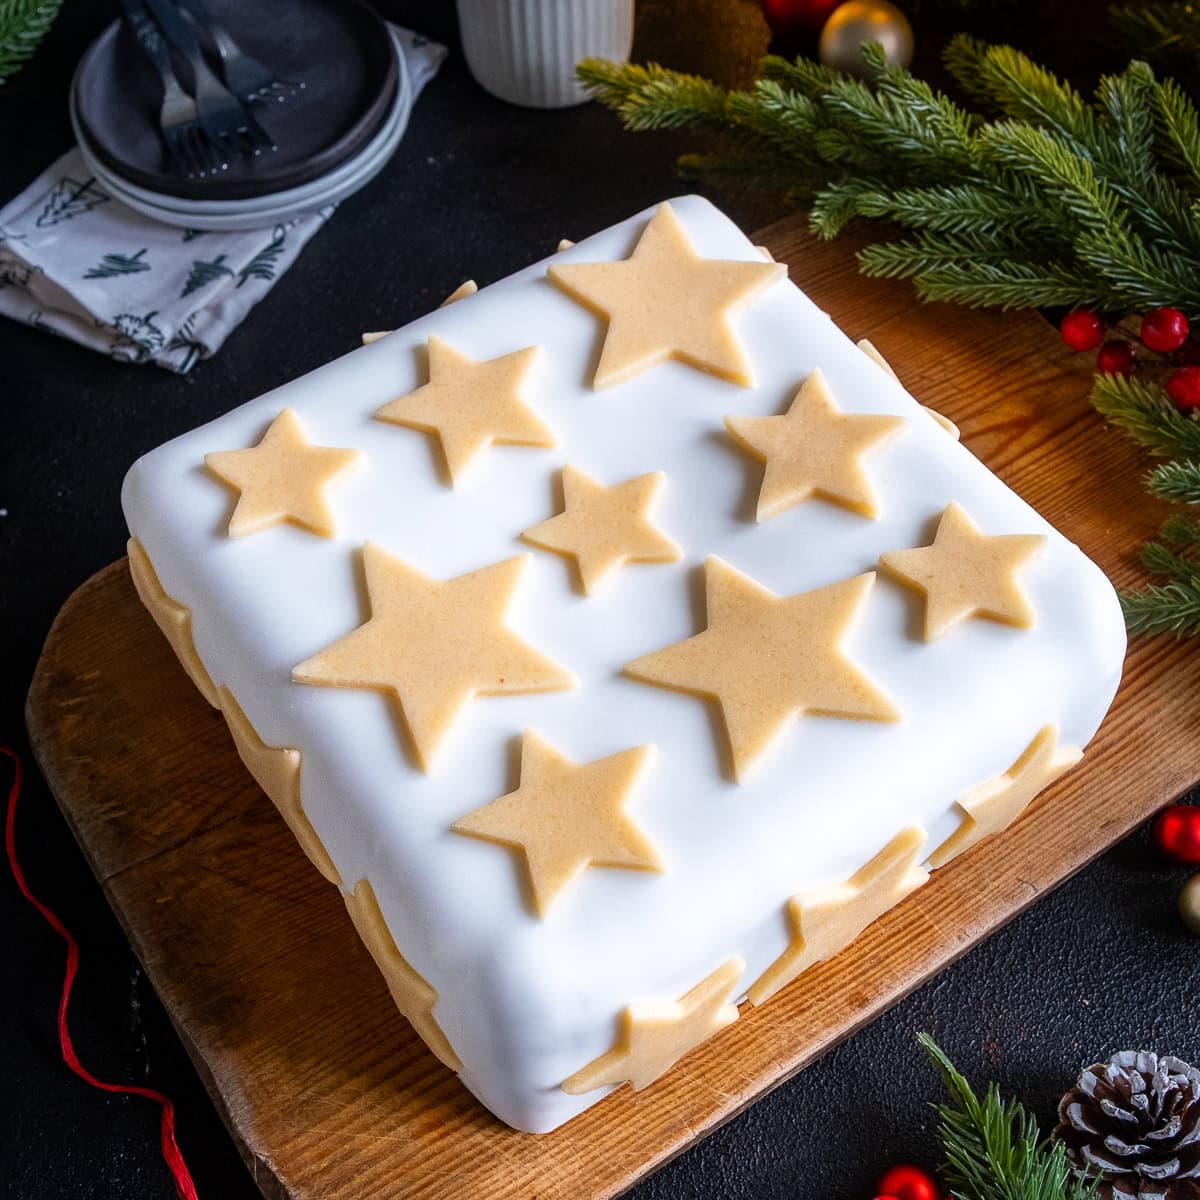
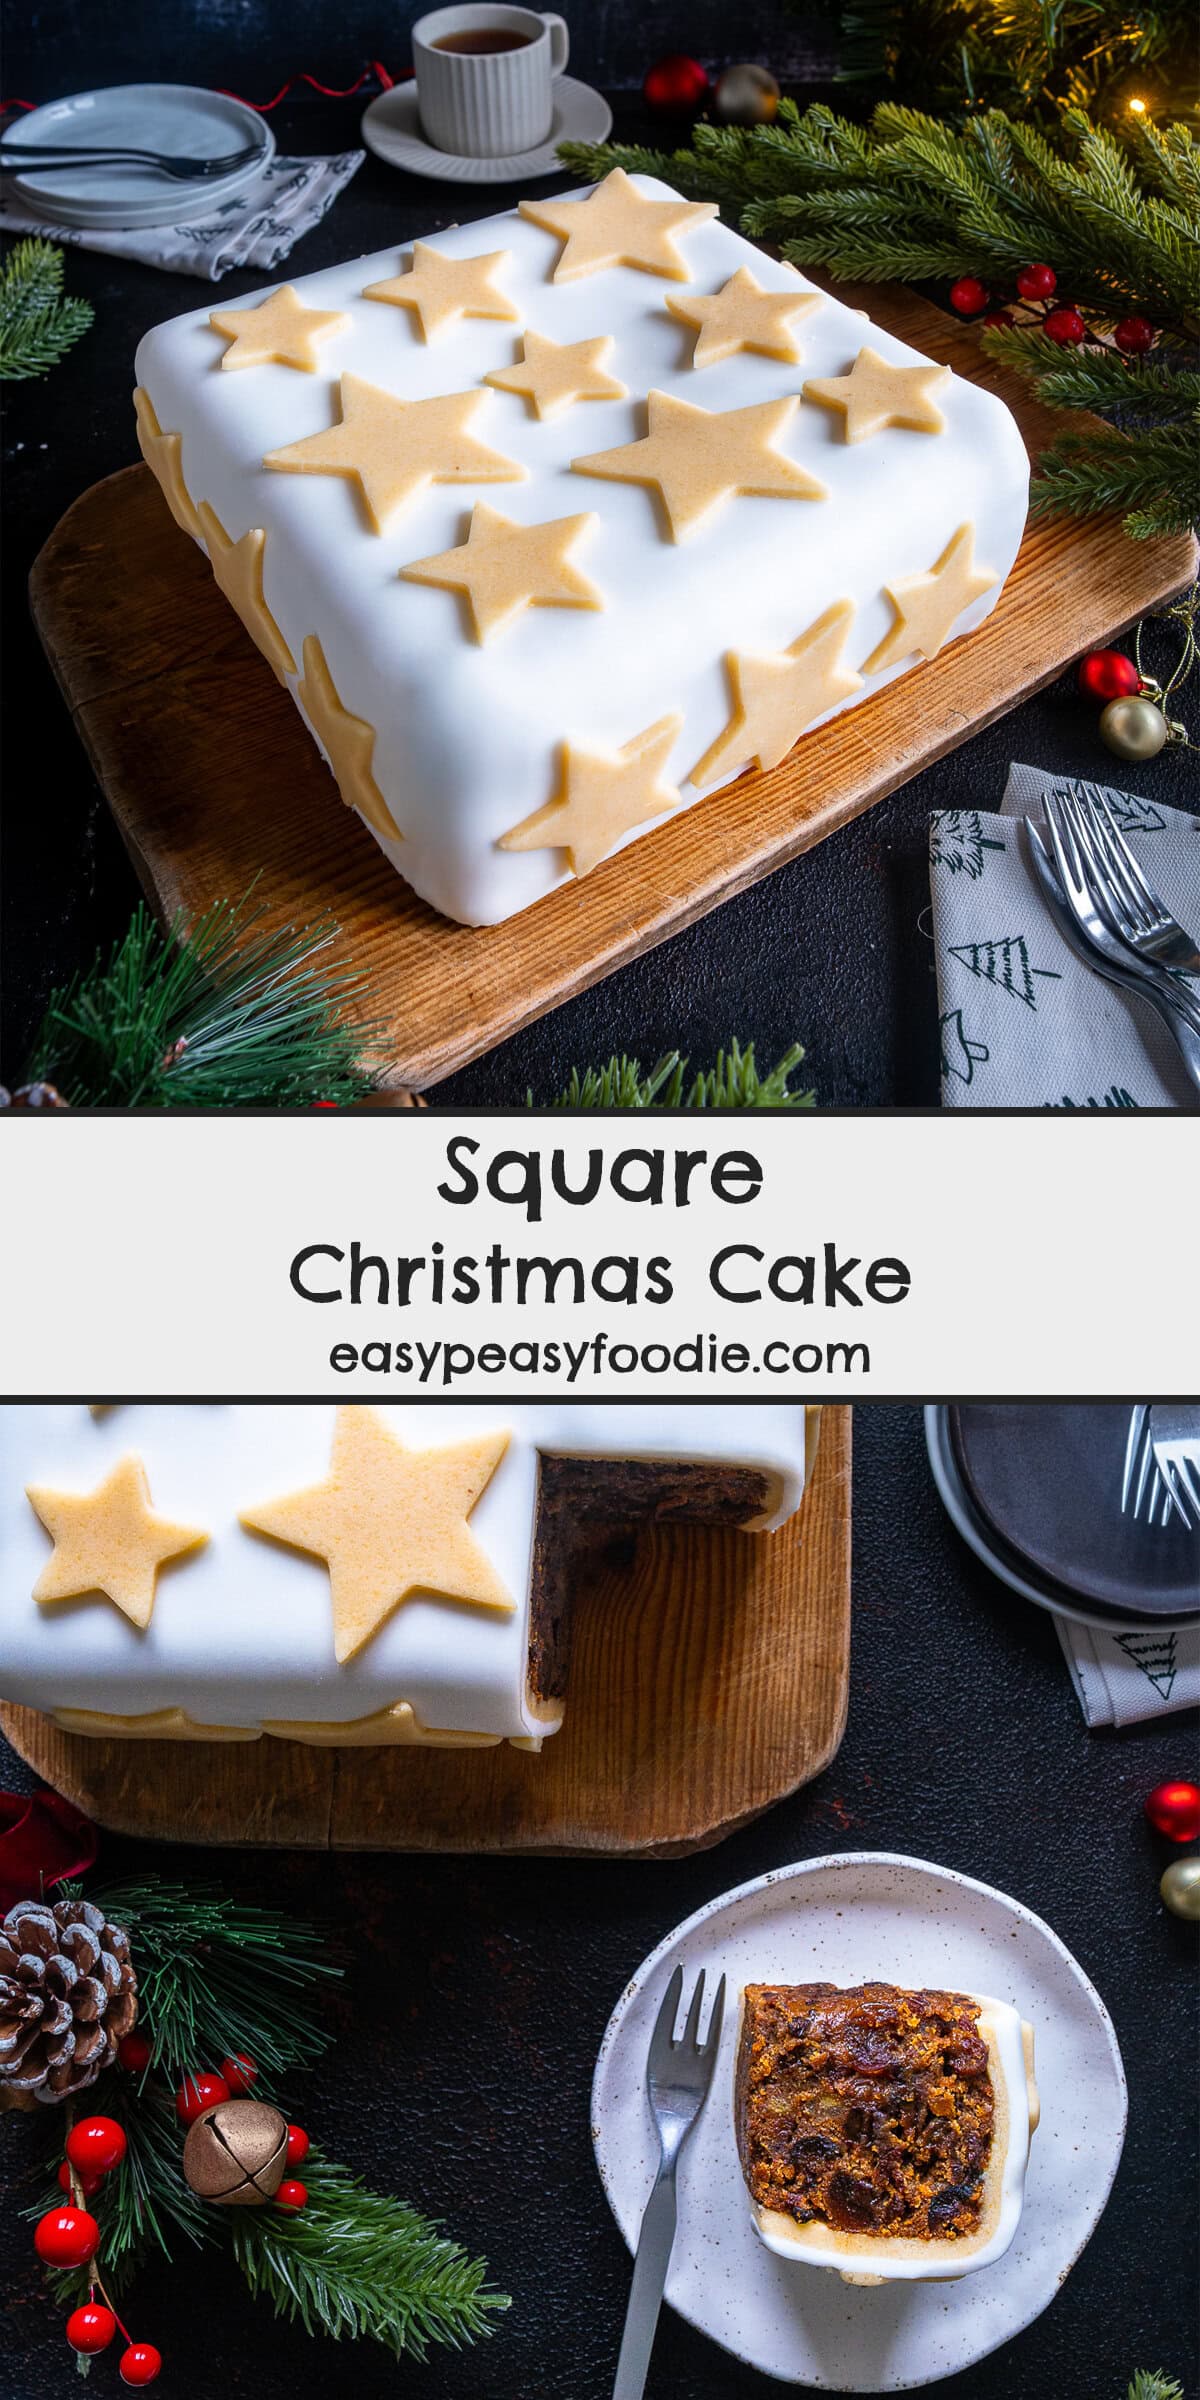
Want to make a square-shaped Christmas cake this year? Then this Easy Square Christmas Cake is for you – everything you’d expect from a traditional Christmas cake, but square! Plus, thanks to a couple of smart tweaks, it’s very simple to make and ready in under 3 hours!
This blog post contains affiliate links, this means if you click on a link and go on to buy the product I recommend, I will get a small commission, but you will not be charged a penny more – thanks in advance!
Want to make a square-shaped Christmas cake?
This Easy Square Christmas Cake is your answer…
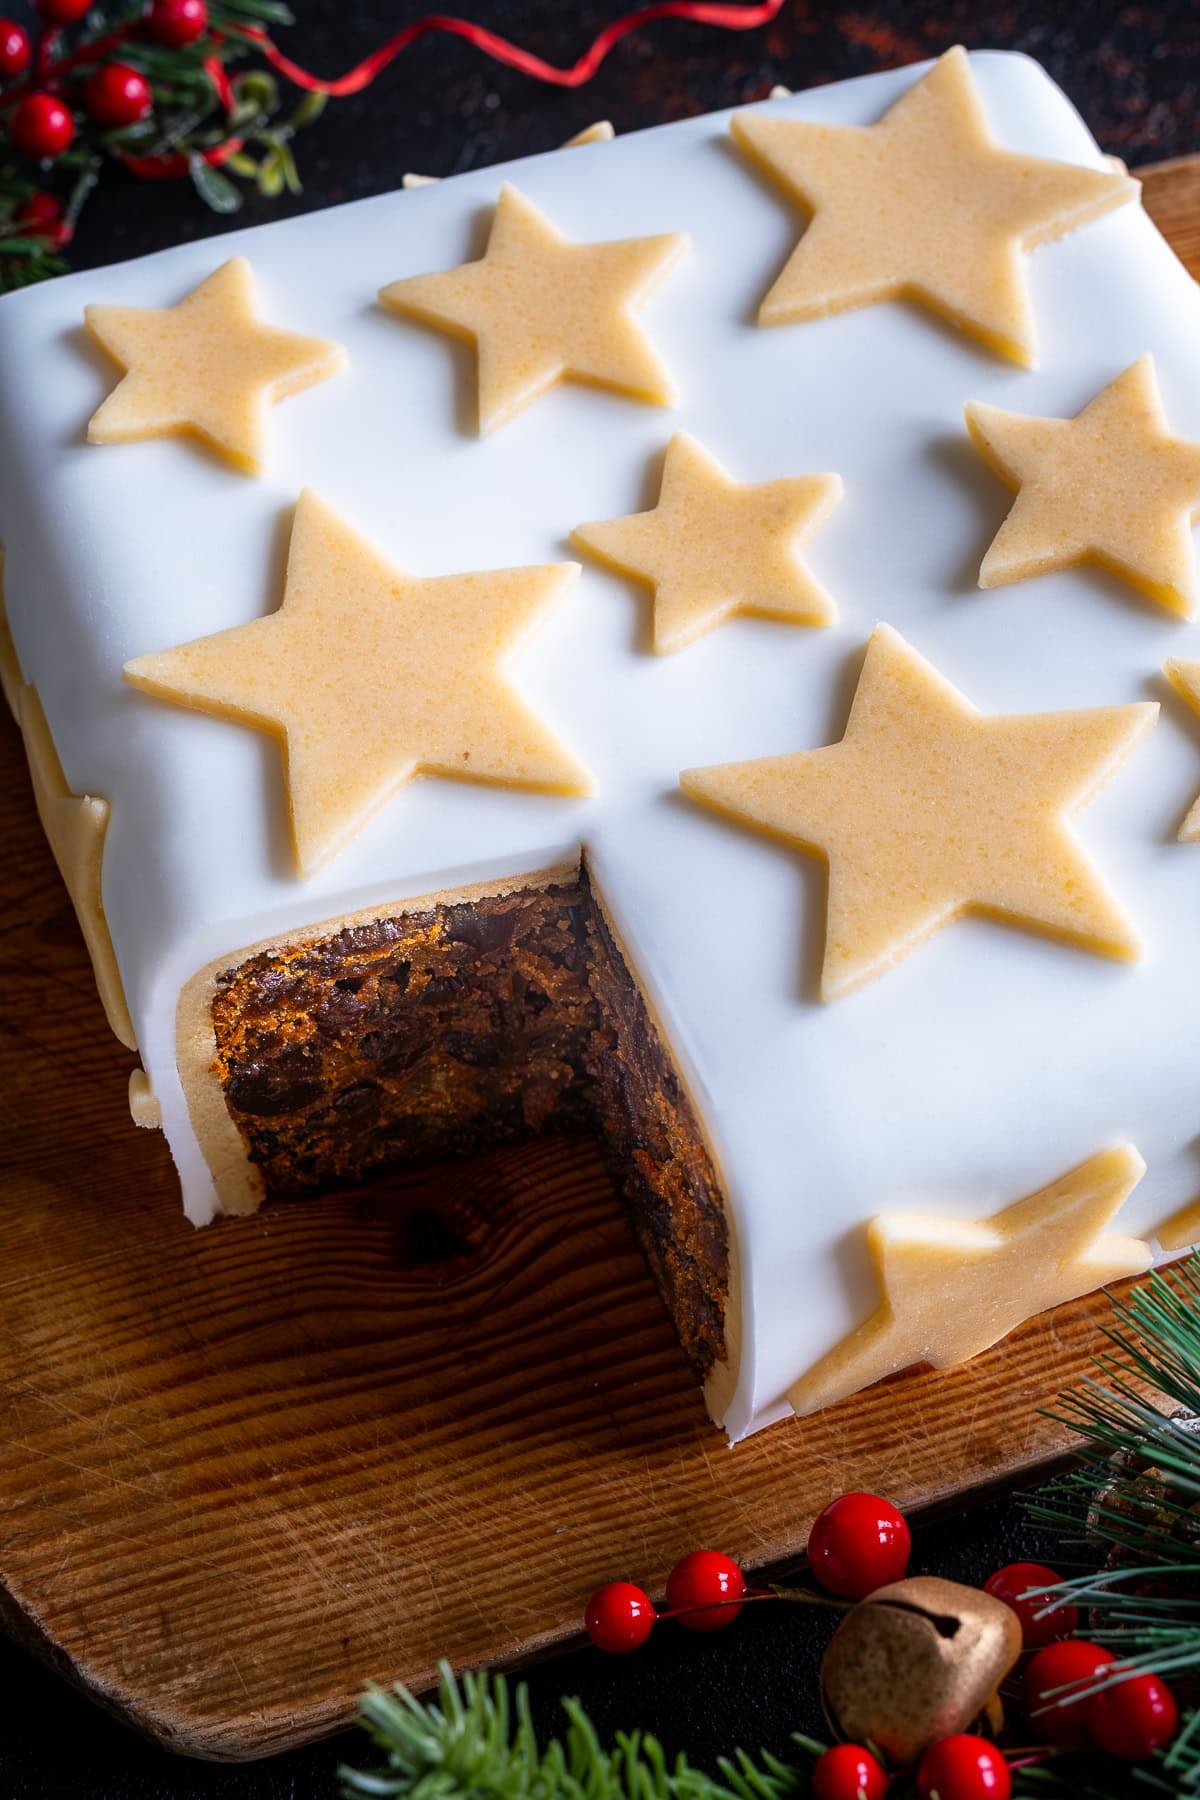
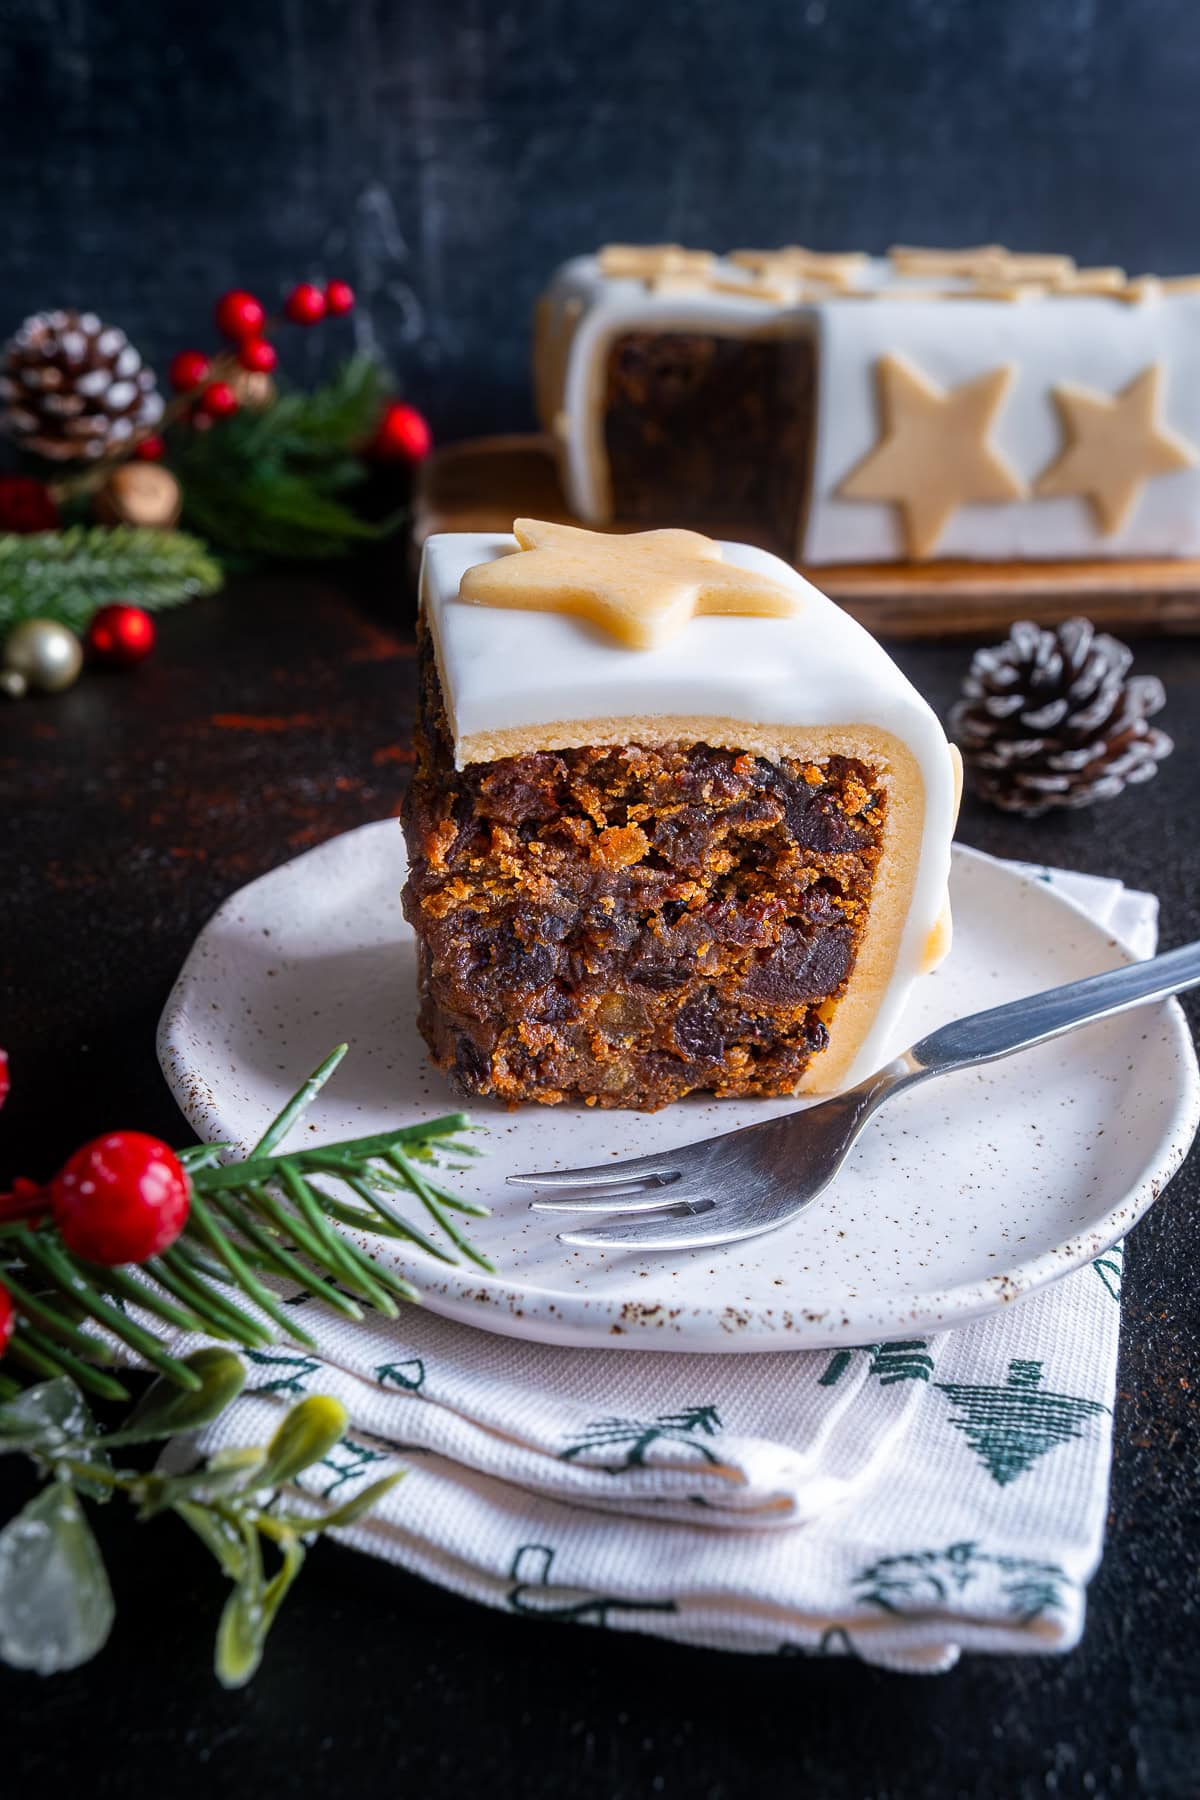
It is a classic British Christmas Cake – full of plump dried fruit, Christmas spices and alcohol – but cooked in a square tin instead of a round one!
And thanks to a few smart tricks and tweaks, it’s very simple to make… and ready in just 3 hours.
As this is a pretty large cake, it does take quite a while to cool down (I recommend overnight), but once it is cool it’s very quick and simple to decorate too!

How to make a square Christmas cake…
This square Christmas cake is so easy to make!
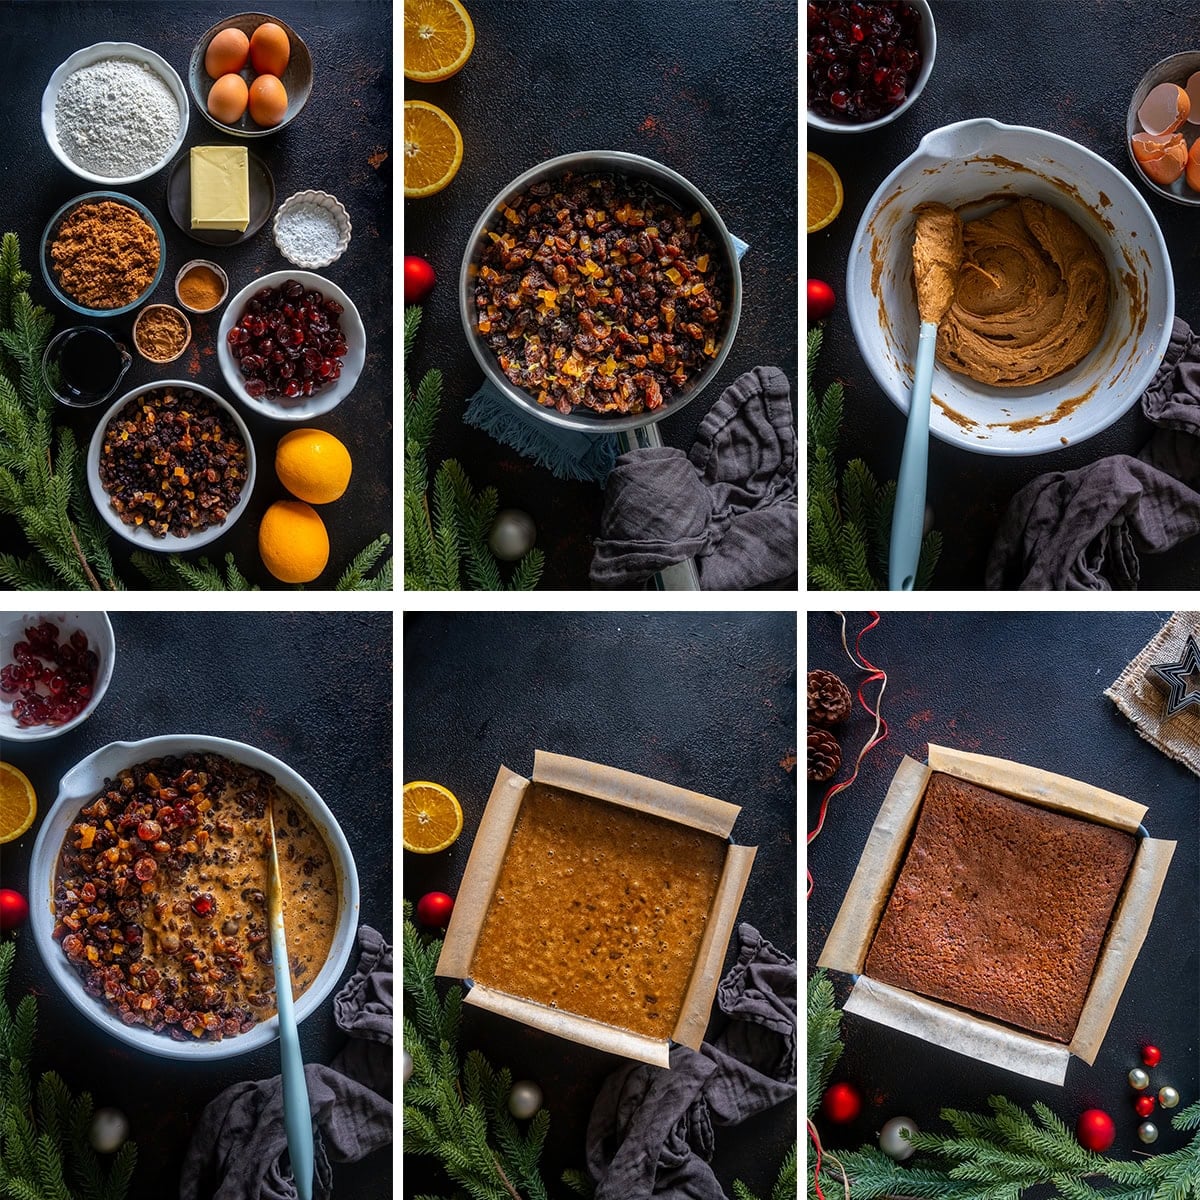
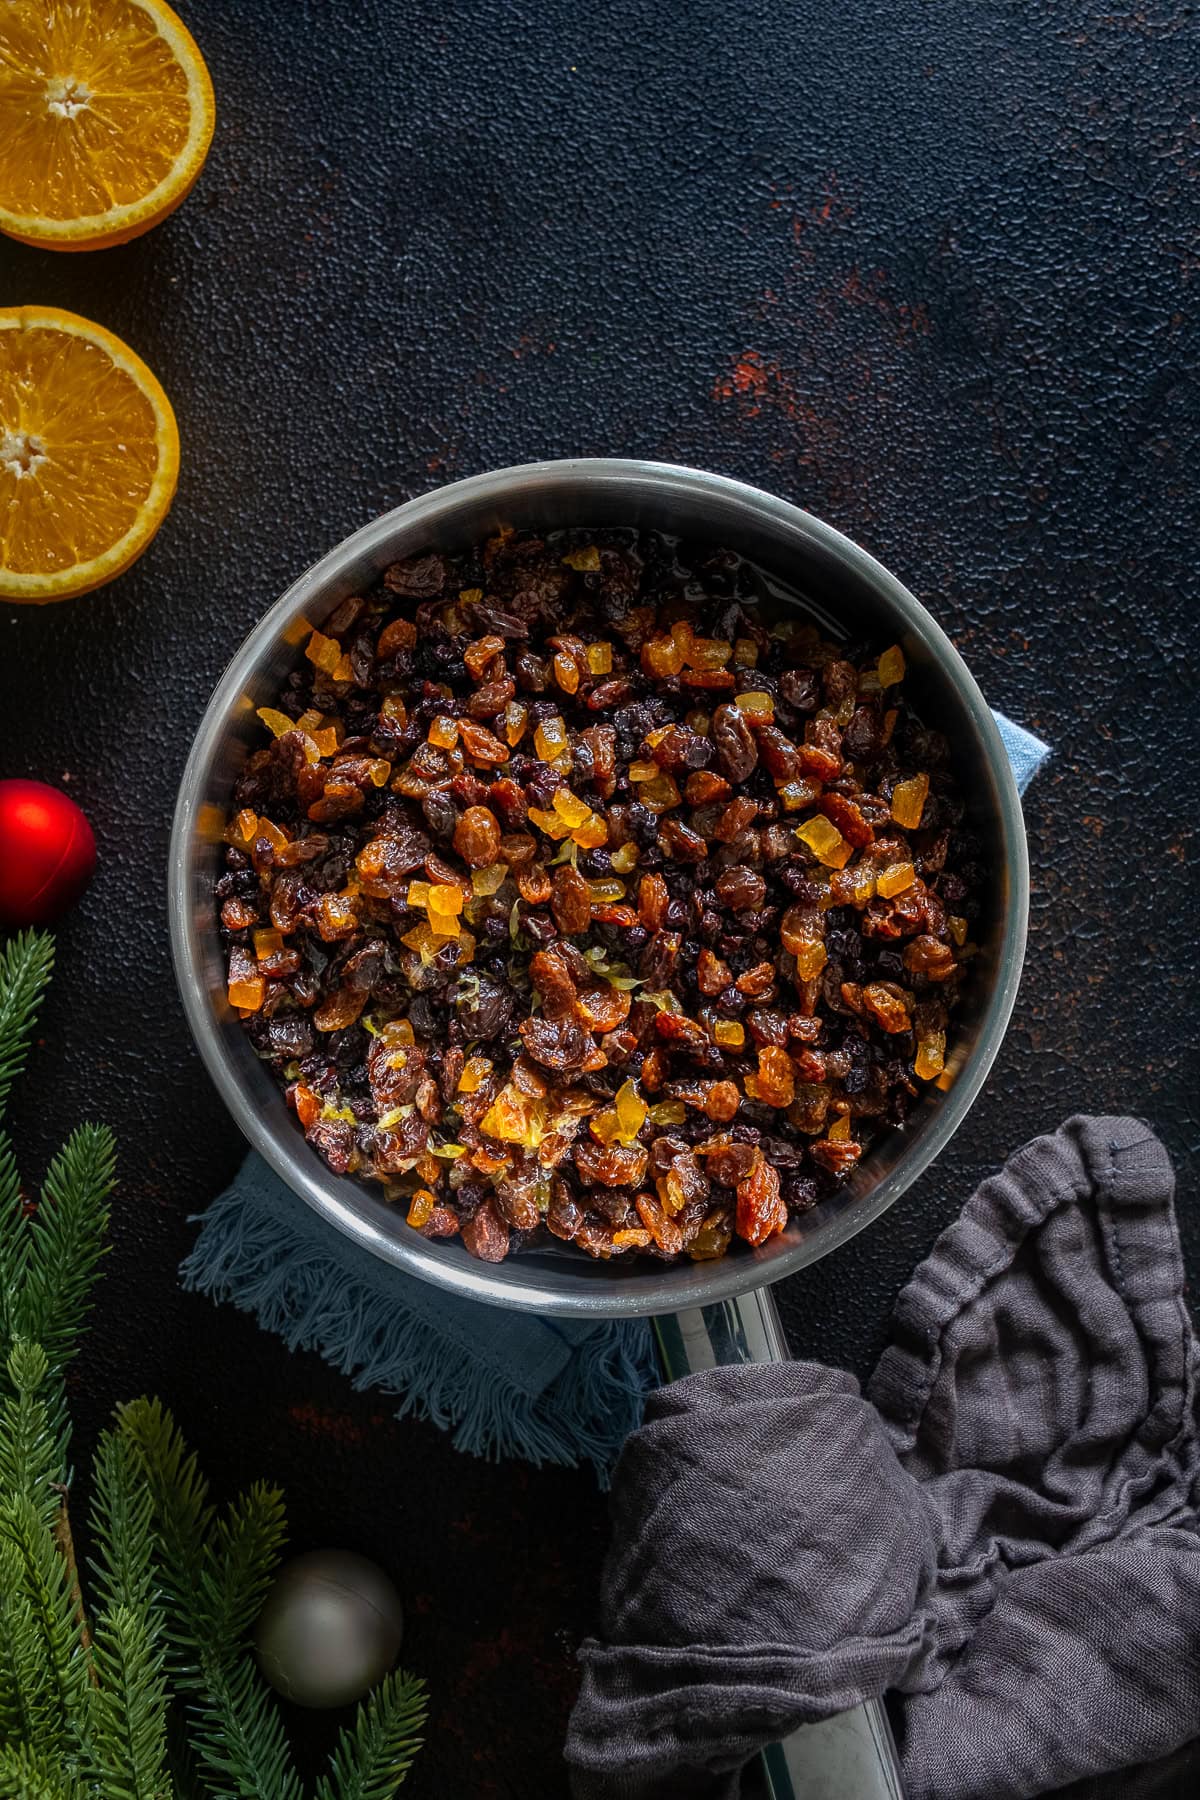
All you need to do is place 1kg dried fruit in a saucepan, add sherry (see the recipe card for alternatives), orange juice and boiling water. Bring to the boil, then simmer.
Meanwhile, beat together butter and sugar, and then add eggs, flour and spices. Next, add in the boiled fruit and plus some glacé cherries and tip the cake mixture into a lined square tin.
Finally, bake in a preheated oven for 2 hours, or until a skewer comes out clean. (No skewer? No worries! Just use a teaspoon handle instead 😀 )
Leave to cool overnight in the tin. It can be decorated the very next day!
(Full recipe given in the recipe card below.)
How to decorate a square Christmas cake
And it’s not just the small Christmas cake that’s easy to make… the decoration is also super easy!
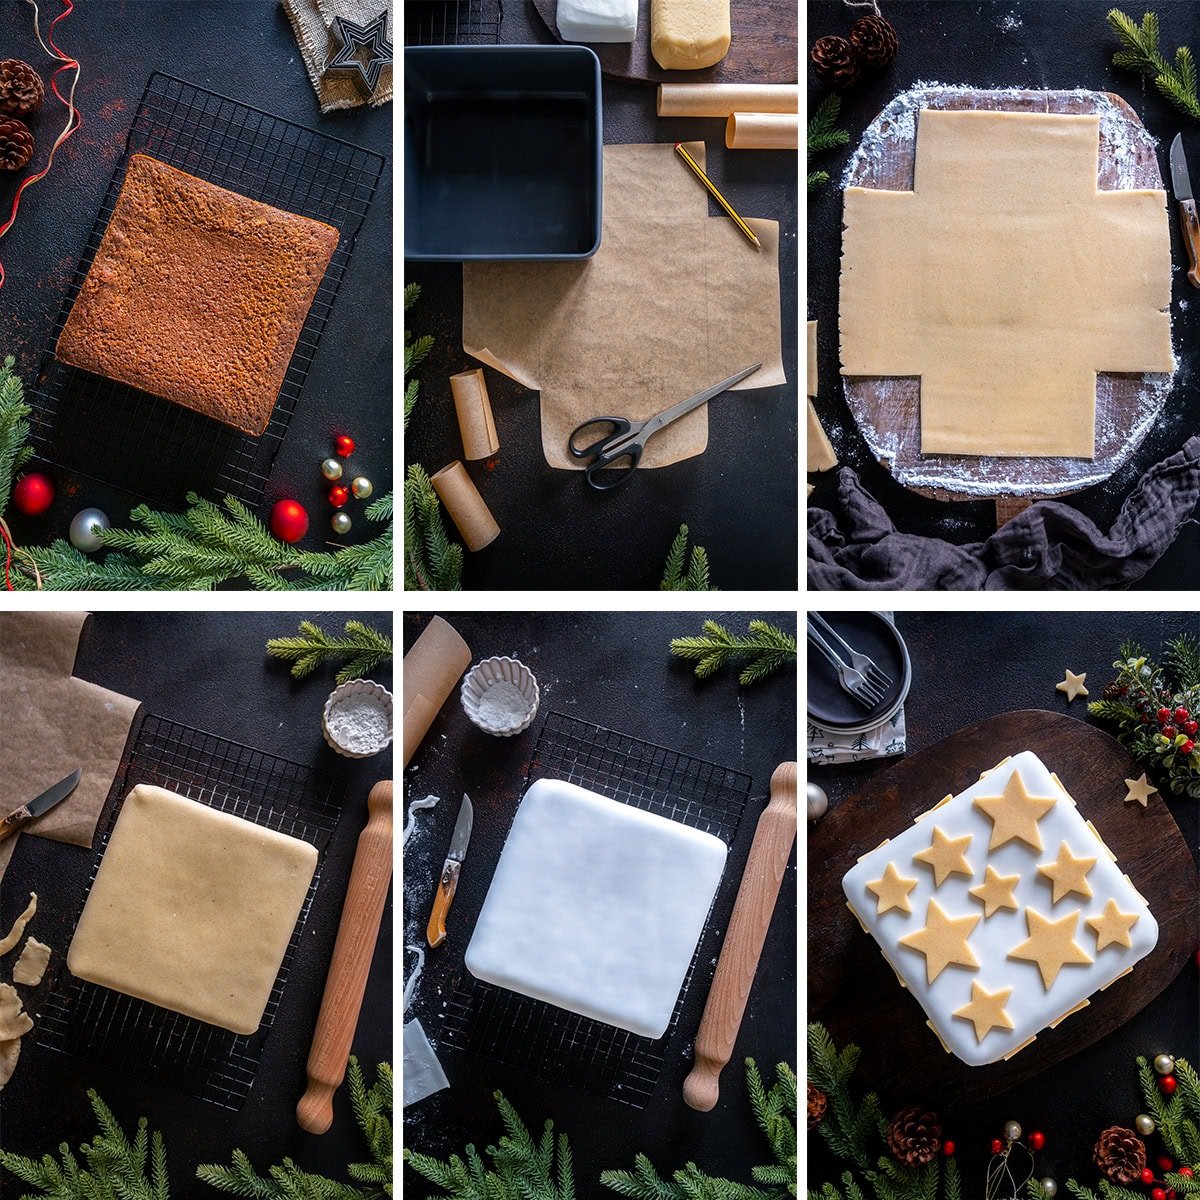
First, take a large piece of baking paper and, using your cake tin as a guide, draw a cross shape. This is now a template for your marzipan and icing.
Next, roll your marzipan out and place your template on the marzipan. Cut round it, then lightly brush the cake with cold water. Lift the marzipan on top of the cake and allow the sides to flap down. Gently squeeze together the edges and then smooth them so they look neat.
Then, roll your fondant out and place your cross template on the fondant. Cut round it, then lightly brush the marzipan with cold water. Lift the fondant on top of the cake and allow the sides to flap down. Gently squeeze together the edges and then smooth them so they look neat.
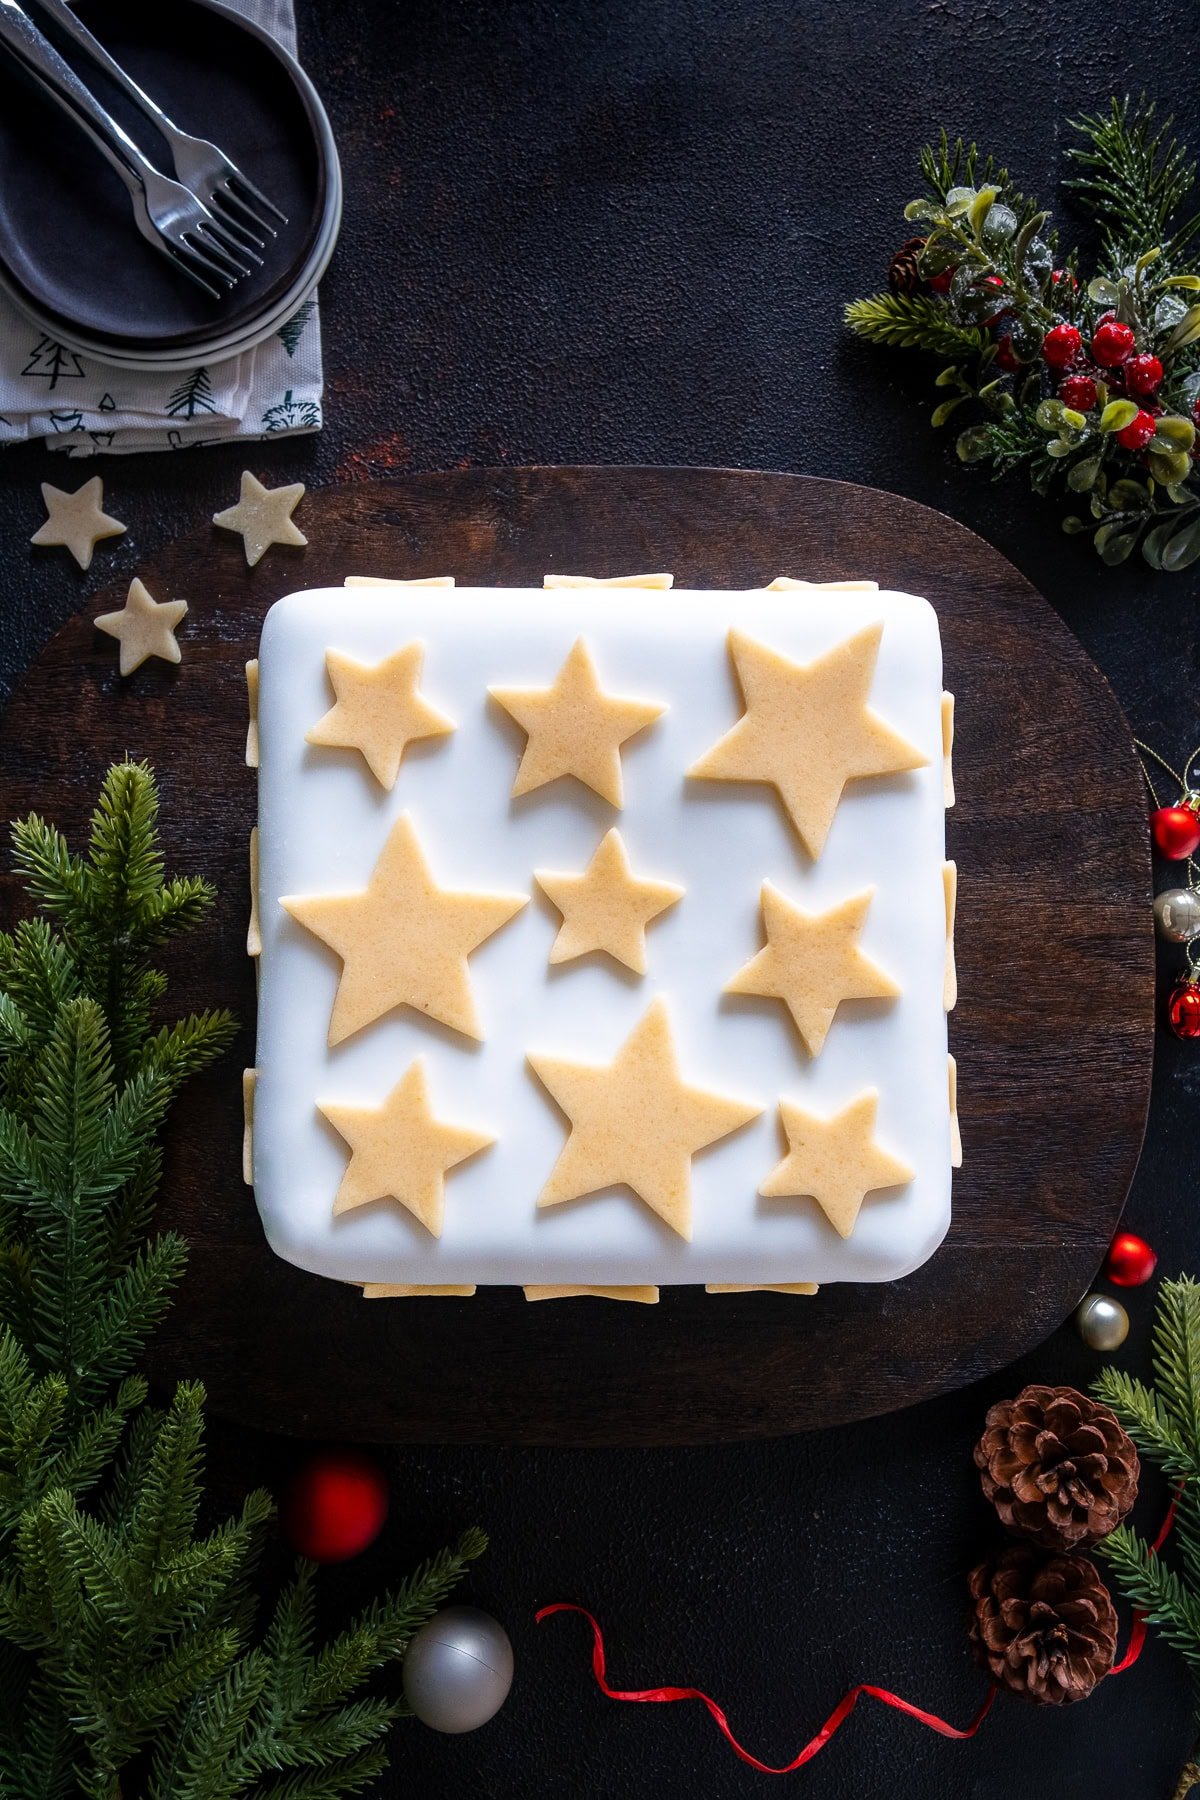
Finally, roll out the remaining marzipan and cut out star shapes. Place these stars on the top and sides of the cake, using cold water on the back of each star to stick them down. Your cake is now ready to eat!
(Full instructions given in the recipe card below.)
Why boil the fruit?
You might be wondering why I boil the fruit for this recipe…
Most Christmas cake recipes require you to soak the dried fruit overnight… it makes the cake wonderfully moist and infuses it with sherry (or whatever tipple you choose).
Well, boiling the fruit achieves all the same benefits of this overnight soaking… but in a fraction of the time – just 10 minutes, in fact!
Honestly, once you’ve tried this method, you’ll never bother soaking the dried fruit overnight again – it’s so easy peasy!
(And if you want to make this alcohol free, simply use apple juice instead of the alcohol.)
No need to feed…
Because this cake is already stuffed full of boozy, plump and juicy fruit, there’s no need to feed this cake with alcohol. It tastes amazing, just as it is. (Though if you want to feed it, that’s totally fine too – see below.)
How to feed a square Christmas cake…
This cake tastes great, just as it is. But if you want to feed it with alcohol here’s how…
- Leave the cake to cool completely.
- Make several small holes in the top of the Christmas cake, using a skewer or knitting needle (or similar).
- Spoon approximately 6 teaspoonfuls of brandy over the top of your cake. (If you don’t like brandy… gin, whisky and rum also work well.)
- Carefully wrap the cake in a layer of baking paper and two layers of foil.
- Repeat once a week, up to a maximum of 4 times.
- Ensure you re-wrap your cake carefully each time after feeding.
- Leave at least a week after the last feed before you decorate your cake.
What size tin should you use for a Square Christmas Cake?
The best size for a square Christmas cake is 20cm / 8inches wide and 8cm / 3inches in height.
I recommend this one from Amazon >>> Non-Stick Teflon Deep Square Cake Tin
(NOTE: This recommended square cake tin above says it is 22x22x8cm, but when I measured it, it was 20x20x8cm)
A cake this size will give you approximately 30 slices, depending on how generous a slice you cut!
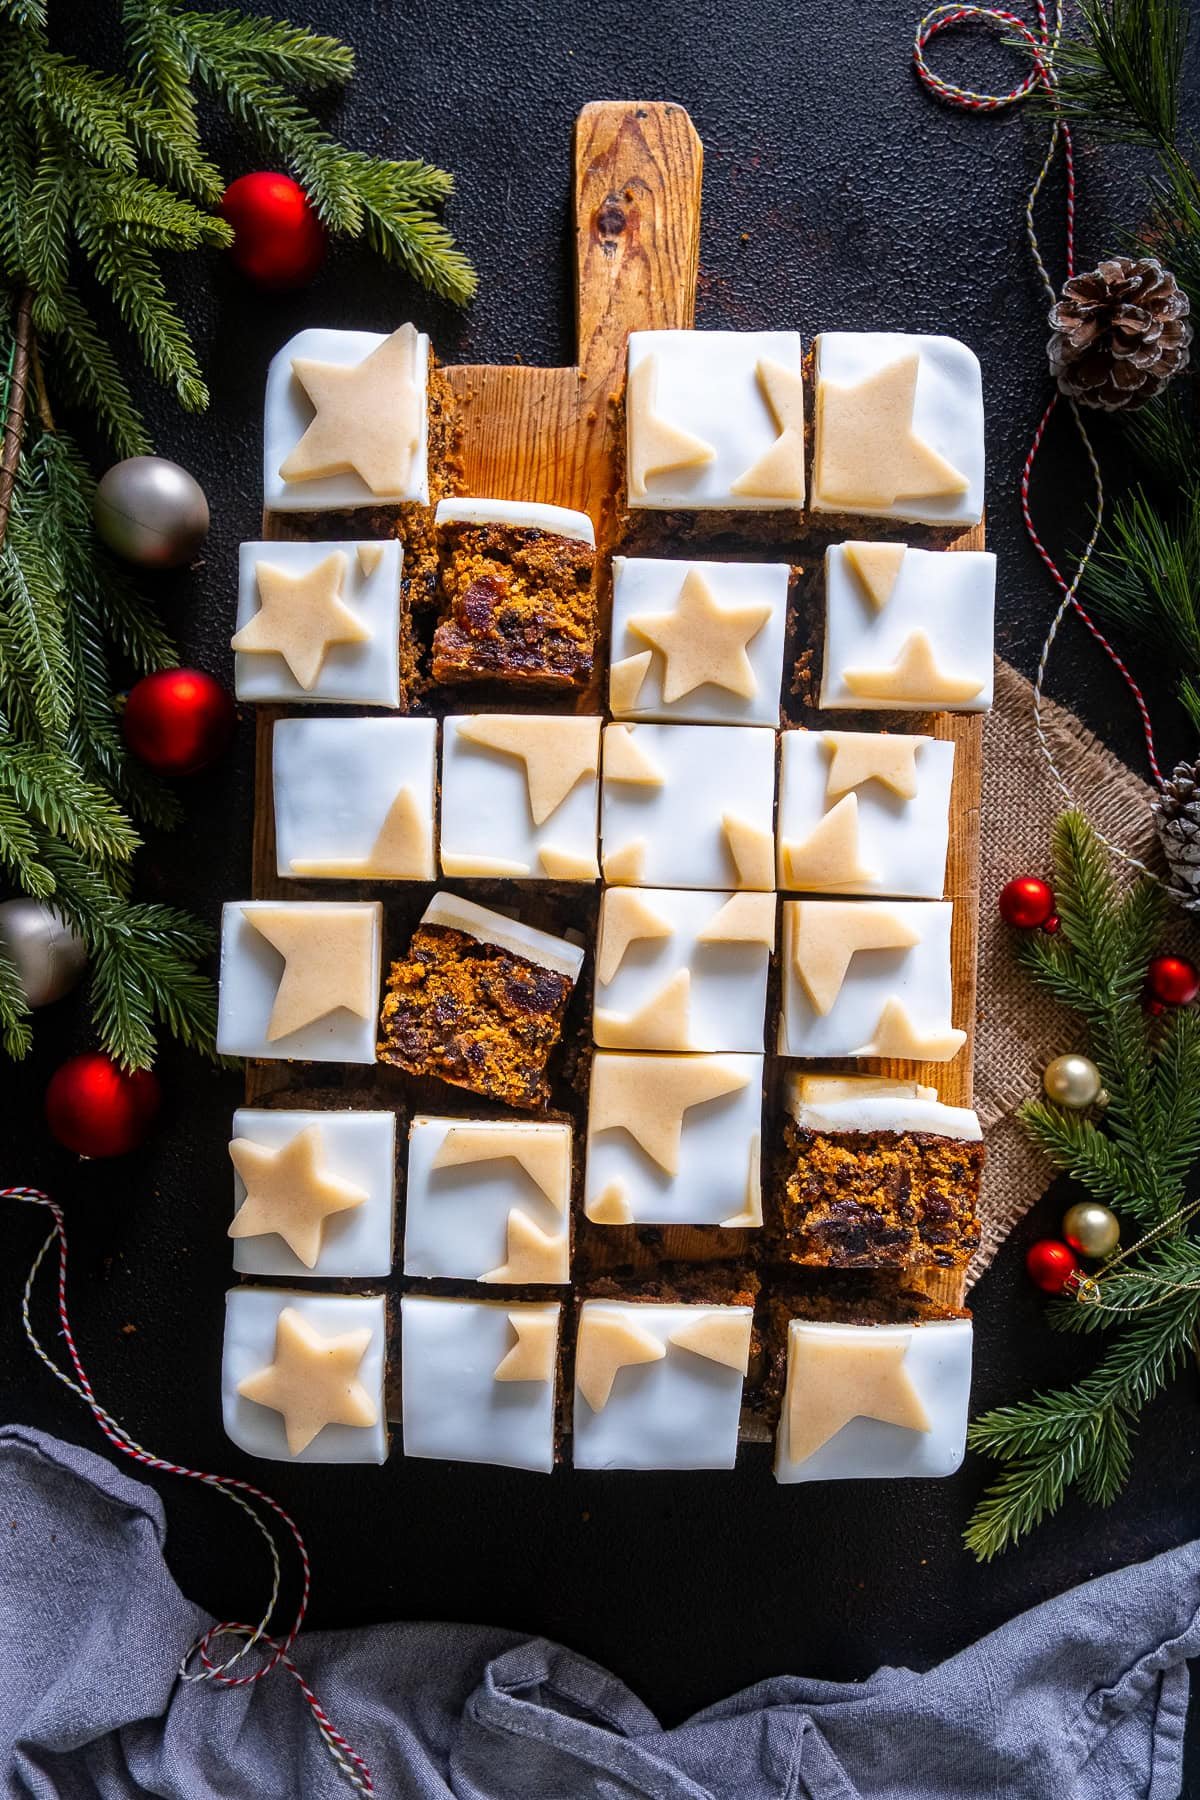
How to cut a square Christmas cake
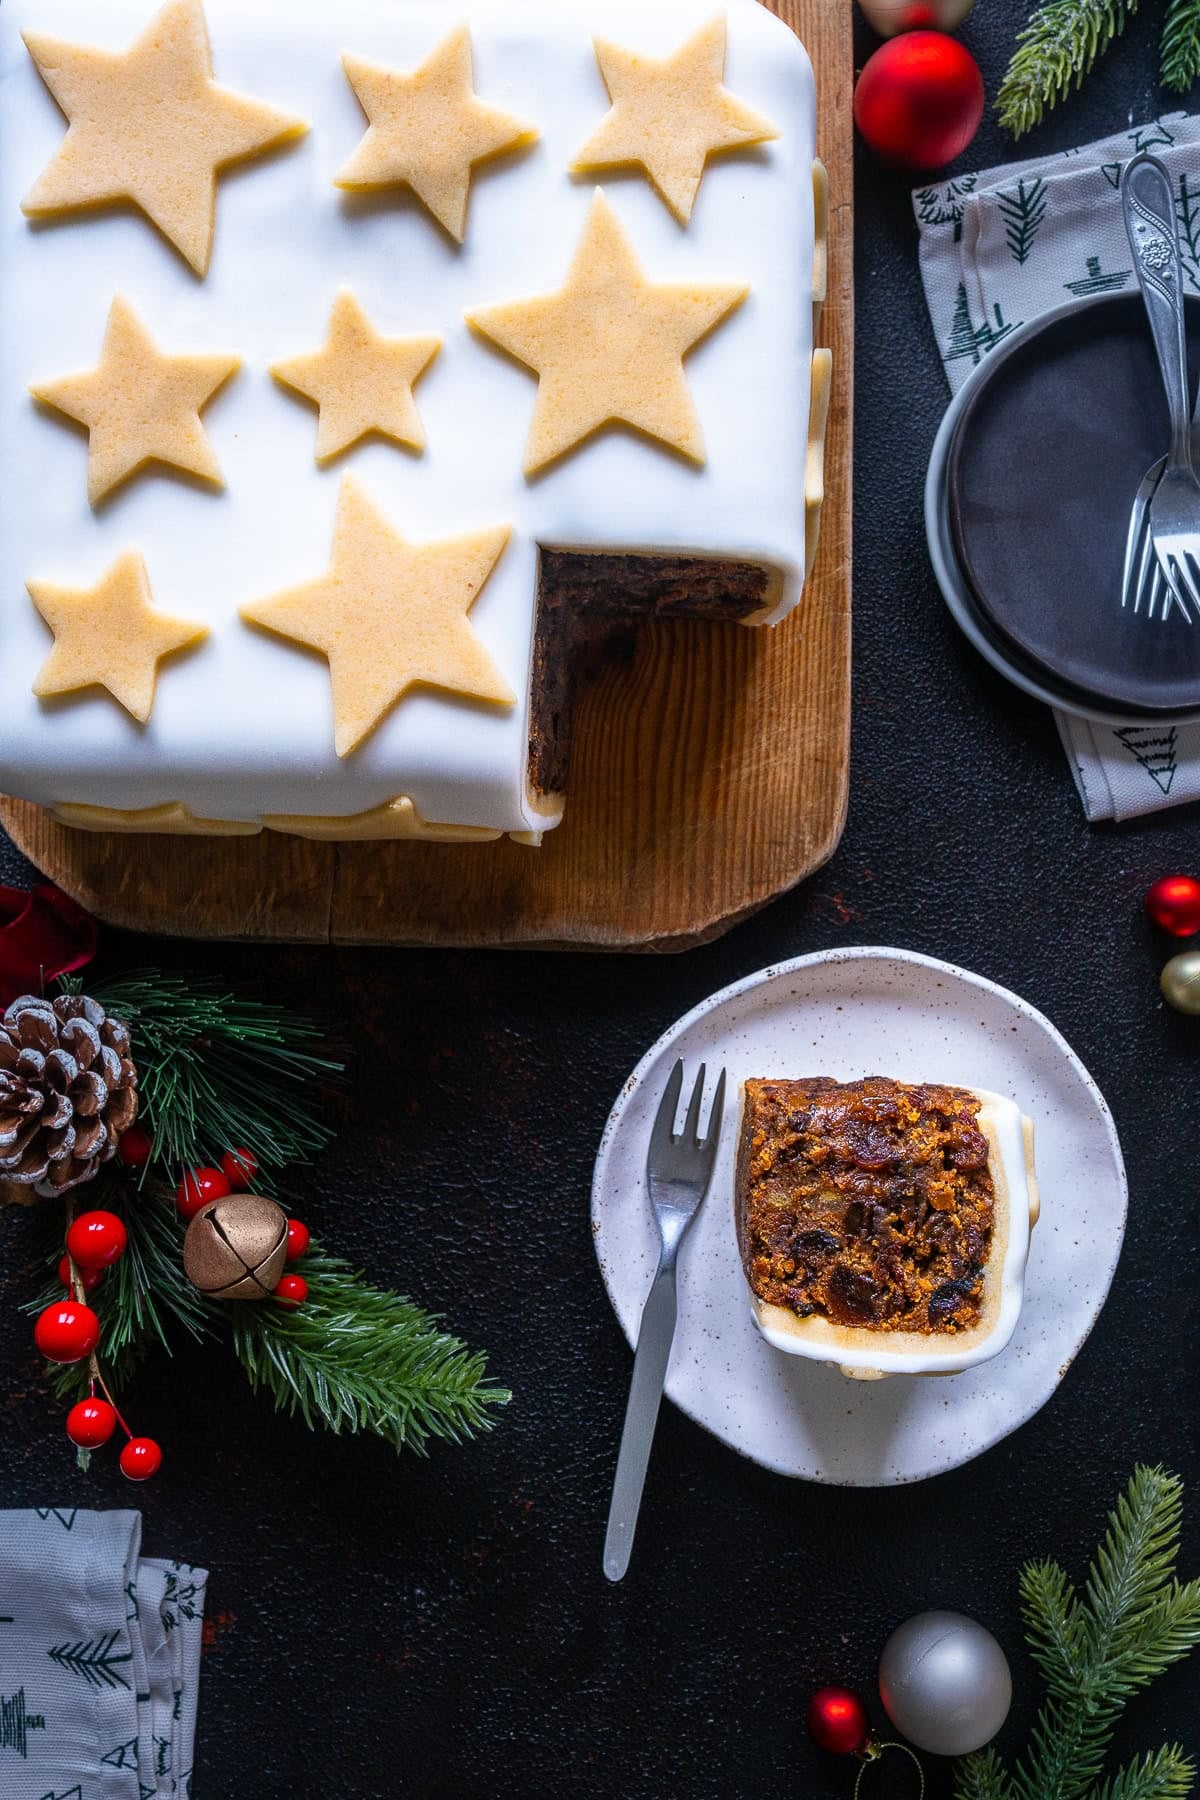
I recommend you cut this square Christmas cake into 30 slices.
To achieve this, cut the cake in thirds one way and into 10 pieces the other way. This will give you slices that are approximately 2cmx7cm.
If you don’t want to cut this Christmas cake up all at once, simple cut in a third and along about 2cm – keep going along until you finish one ‘row’ then cut in another third and along 2cm and continue until you only have one third of the cake left. Then cut the final row along 2cm at a time.
(The picture below shows a double slice 4cm x 7cm)
How to line a square Christmas cake tin
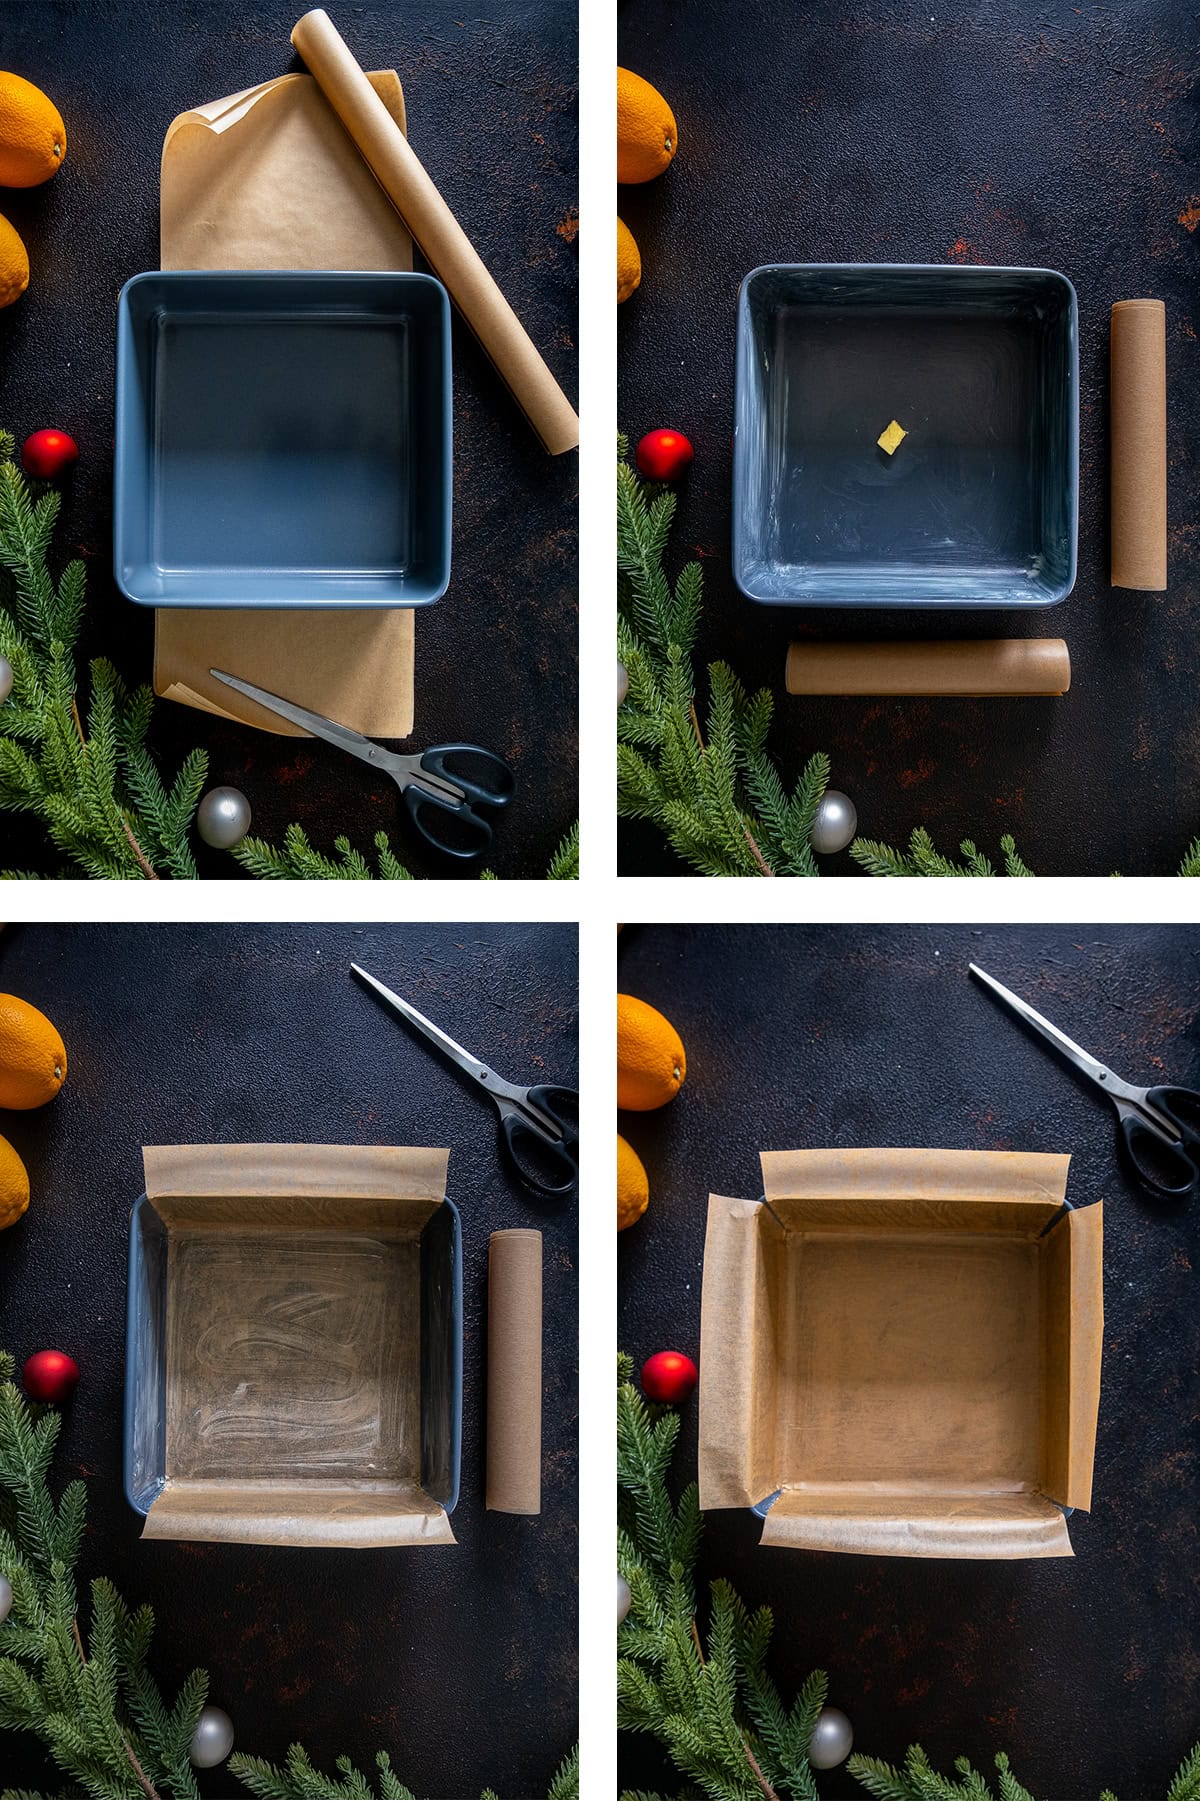
You will definitely need to line the tin for this recipe, but it’s really quick and easy to do! Simply cut two pieces of baking parchment which are as wide as the width of your pan, but much longer.
Grease the base and sides of your pan with a little butter (use an offcut of baking parchment to spread the butter) and lay one of the pieces of baking paper so it covers the base and two of the sides with a little bit sticking up above the pan on each side.
Grease the base of the pan and lay the other piece of baking parchment in the opposite direction, to cover the base and the other two sides, again with a little bit sticking up above the pan on each side.
Finally, grease the base and sides again, just for good measure. (In theory, cake shouldn’t stick to baking paper – in practice, an extra layer of butter really does help the cake come off the paper better!)
Alternatives to a Square Christmas Cake
I have several other options if this cake is not quite right for you!
Option 1 is this Easy Christmas Loaf Cake recipe – it makes 2 x 1lb loaf cakes. So you could make one for now and one to store / freeze / give away.
Option 2 are these delicious Christmas Cake Muffins – all the flavours of a classic Christmas cake in muffin form.
Option 3 is this All-In-One Christmas Cake – this cake is made all in one pan, so even less washing up to do!
Option 4 is my Easy Christmas Cake Traybake – great for a bake sale!
And option 5 is Last Minute Emergency Christmas Cake – great for any last minute Christmas cake emergencies.
Or, if you want the Christmas cake vibes, but in a different format, why not try my No Bake Christmas Cake Cheesecake?
Easy Christmas Cake Traybake
How to store a Square Christmas Cake
If you want to store this Square Christmas Cake BEFORE decorating, simply wait until the cake is completely cold, then wrap first in a layer of baking paper and then a layer of foil. Ideally you would then put the cake in an airtight tin or storage box. However, if you can’t find a cake tin the right size, simply wrap in a second layer of foil.
If you want to store this Square Christmas Cake AFTER decorating, you will need to put the cake in an airtight tin or storage box. I recommend this Cake Box Carrier – which has a handy little handle so you can easily transport it too – perfect for bake sales, Christmas parties, church gatherings etc.

How long will this Christmas cake last?
Un-decorated, and correctly stored (see above), this Christmas cake will last for up to 6 months, though I recommend eating within 3 months for the optimal flavour and texture.
Once decorated, this Christmas cake will only last for a few weeks – a month at most. But for optimal flavour, I recommend eating within 2 weeks.
Can you freeze Christmas cake?
Amazingly yes! You can freeze the un-decorated cake. First wrap in baking paper and a double layer of foil – as explained above, then pop it in your freezer, where it will keep for up to a year.
Defrost at room temperature and decorate as above.
I wouldn’t recommend freezing an iced Christmas cake, however, as the marzipan and fondant icing do not fare well in the freezer!

If you like this recipe…
…you might also like:
- Easy Mincemeat Christmas Cake (The BEST Christmas Cake Hack!)
- Easy Mincemeat Brownies
- Christmas Tree Brownies
- Iced Mince Pies
- Crumble Topped Mince Pies

Christmas Tree Brownies

Easy Square Christmas Cake
Ingredients
For the cake...
- 1 kg mixed dried fruit ideally including mixed peel – see Note 1
- Juice of 2 oranges
- 200 ml sherry or brandy / whisky / gin / rum – or use apple juice if you want this to be alcohol free
- 200 ml boiling water
- 300 g butter plus extra for greasing
- 300 g soft dark brown sugar or muscovado sugar
- 4 large eggs
- 300 g self-raising flour US – self-rising flour
- 4 teaspoons mixed spice or pumpkin spice
- 2 teaspoons cinnamon
- 400 g glacé cherries halved
To decorate...
- 1 kg marzipan I prefer the paler ‘natural’ colour… but the bright yellow stuff works too!
- 1 kg white fondant icing
- Icing sugar US – confectioner’s sugar for rolling out the marzipan and fondant icing
Instructions
For the cake...
- Place the dried fruit in a large saucepan. Squeeze over the juice of the 2 oranges and pour over the sherry and boiling water. Bring to the boil, then simmer for 10 minutes, stirring every couple of minutes. Leave to stand until needed.
- Preheat your oven to 140C / 120C fan / gas mark1 / 275F. Grease and line your cake pan with baking paper (see above). Your cake pan should be 20cm x 20cm x 8cm = 8inch x 8inch x 3inch (I used THIS ONE - it says 22cm x 22cm x 8cm, but when you actually measure it, it’s 20cm x 20cm x 8cm)
- In a very large mixing bowl, beat together the butter and sugar thoroughly.
- Add the eggs, one at a time, beating the mixture until smooth after each one.
- Gently fold in the flour, mixed spice and cinnamon until fully incorporated.
- Add the glacé cherries and the dried fruit, plus any remaining liquid from the saucepan. (There should be very little liquid left, as most of it will have soaked into the fruit or evaporated.) Stir gently until the fruit is evenly distributed.
- Tip the cake mixture into your prepared cake tin and get it straight into the oven. Bake for 2 hours 15 minutes, or until a skewer (or toothpick, or teaspoon handle), inserted into the middle of the cake, comes out clean. (I check every 5 minutes from 2 hours. It usually takes 2 hours 15 minutes in my oven.)
- Leave to cool overnight in the tin (See Note 2) then remove from the tin and decorate. Do not decorate until completely cool!
To decorate...
- Take a large piece of baking paper and, using your cake tin (the one you just cooked your cake in!) as a guide, draw a cross shape. First draw round the base of your cake tin – this is the centre of your cross. Then tip your cake tin on its side and draw round that side. Repeat for all the other sides, then cut out your cross. When you put the cross on top of your cake it should cover the top and sides perfectly. This is now a template for your marzipan and icing.
- Dust your worksurface with icing sugar. Take the marzipan and roll it out to just a fraction larger than the cross template. Place your cross template on the marzipan and cut round it, ensure you cut a little bit wider than the actual template to allow enough to overlap slightly on the corners.
- Brush the cake with a very small amount of cold water. (This is to help the marzipan stick to the cake – be very sparing, you don’t want to make the cake wet!)
- Lift the the marzipan on top of the cake and allow the sides to flap down. Gently squeeze together the edges and then smooth them so they look nice and neat.
- Gather up the scraps of marzipan into a ball and keep them – you will need them later.
- Dust your worksurface with icing sugar again. Take the fondant and roll it out to just a fraction larger than the cross template. Place your cross template on the fondant and cut round it, ensure you cut a little bit wider than the actual template to allow enough to overlap slightly on the corners.
- Brush the marzipan with a very small amount of cold water. (This is to help the fondant stick to the marzipan – be very sparing, you don’t want to make the marzipan wet!)
- Lift the fondant on top of the cake and allow the sides to flap down. Gently squeeze together the edges and then smooth them so they look nice and neat.
- Roll out the remaining marzipan and cut out a variety of different sized stars. (Or whatever Christmas shapes you like!)
- Place these stars at random on the top and sides of the cake, using a little cold water on the back of each star to stick them down.
- Your cake is now ready to eat!
Notes
- Ideally you want the dried mixed fruit to be a mix of sultanas, raisins, currants and candied mixed peel. You can usually find this ready mixed in supermarkets. If you can't find it ready mixed, buy the ingredients individually and go for these proportions: 40% sultanas / 30% raisins / 20% currants / 10% candied mixed peel.
- I have found that, through trial and experience, even if the skewer comes out clean, the cake can be a tiny bit undercooked, however if you continue to cook it any longer in the oven the edges tend to dry out. The ‘fix’ is to take the cake out as soon as the skewer comes out clean, but then leave the cake to cool in the tin. The result is the middle gets fully cooked, without drying out the edges and you get a much better cake!
- Suitable for freezing (if un-decorated).
- Nutrition information is approximate and meant as a guideline only.
- The fondant and marzipan add a lot of calories! The un-decorated cake is approximately 290 kcal per slice.
Pin Easy Square Christmas Cake for later
FREE 4 Week Easy Dinners Meal Plan
Have you got your hands on a copy of my meal plan yet? If not CLICK HERE to download a copy of my FREE 4 Week Easy Dinners Meal Plan today!
Don’t want to miss a thing?
Follow me on Twitter, Facebook and Instagram. Or why not subscribe to my blog and get delicious, stress free recipes straight to your inbox every week?
Disclosure
This blog post contains affiliate links, this means if you click on a link and go on to buy the product I recommend, I will get a small commission, but you will not be charged a penny more – thanks in advance!
Leave a Reply