
Want to start a food blog, but don’t know where to begin? I’m here to help! Here is my easy to follow step-by-step guide to starting a food blog in 2026…

This blog post contains affiliate links, this means if you click on a link and go on to buy the product I recommend, I will get a small commission, but you will not be charged a penny more – thanks in advance!
How to start a food blog
Ready to start your food blog? In this guide I will take you step-by-step through all the things you need to do to create and set up your food blog.
But before you get started, I highly recommend that you first read this post: 10 top tips for wannabe food bloggers, where I cover all the things you need to do BEFORE you start your blog.
Ready to get started? Here’s what you need to do…
1. Decide whether your blog will be hosted or self-hosted
The first thing you need to do is decide if you want to have a hosted or self-hosted blog. If you are not sure what that means, read my guide: Hosted vs self-hosted: which is best for your blog?
I strongly recommend going self-hosted if you are serious about blogging. Self-hosted is much more flexible than hosted and widely considered to be more professional, plus it offers more opportunity to make money in the long run and it’s less risky (because you technically don’t own your blog if it’s hosted!)
In this tutorial I am going to show you how to set up a self-hosted blog.

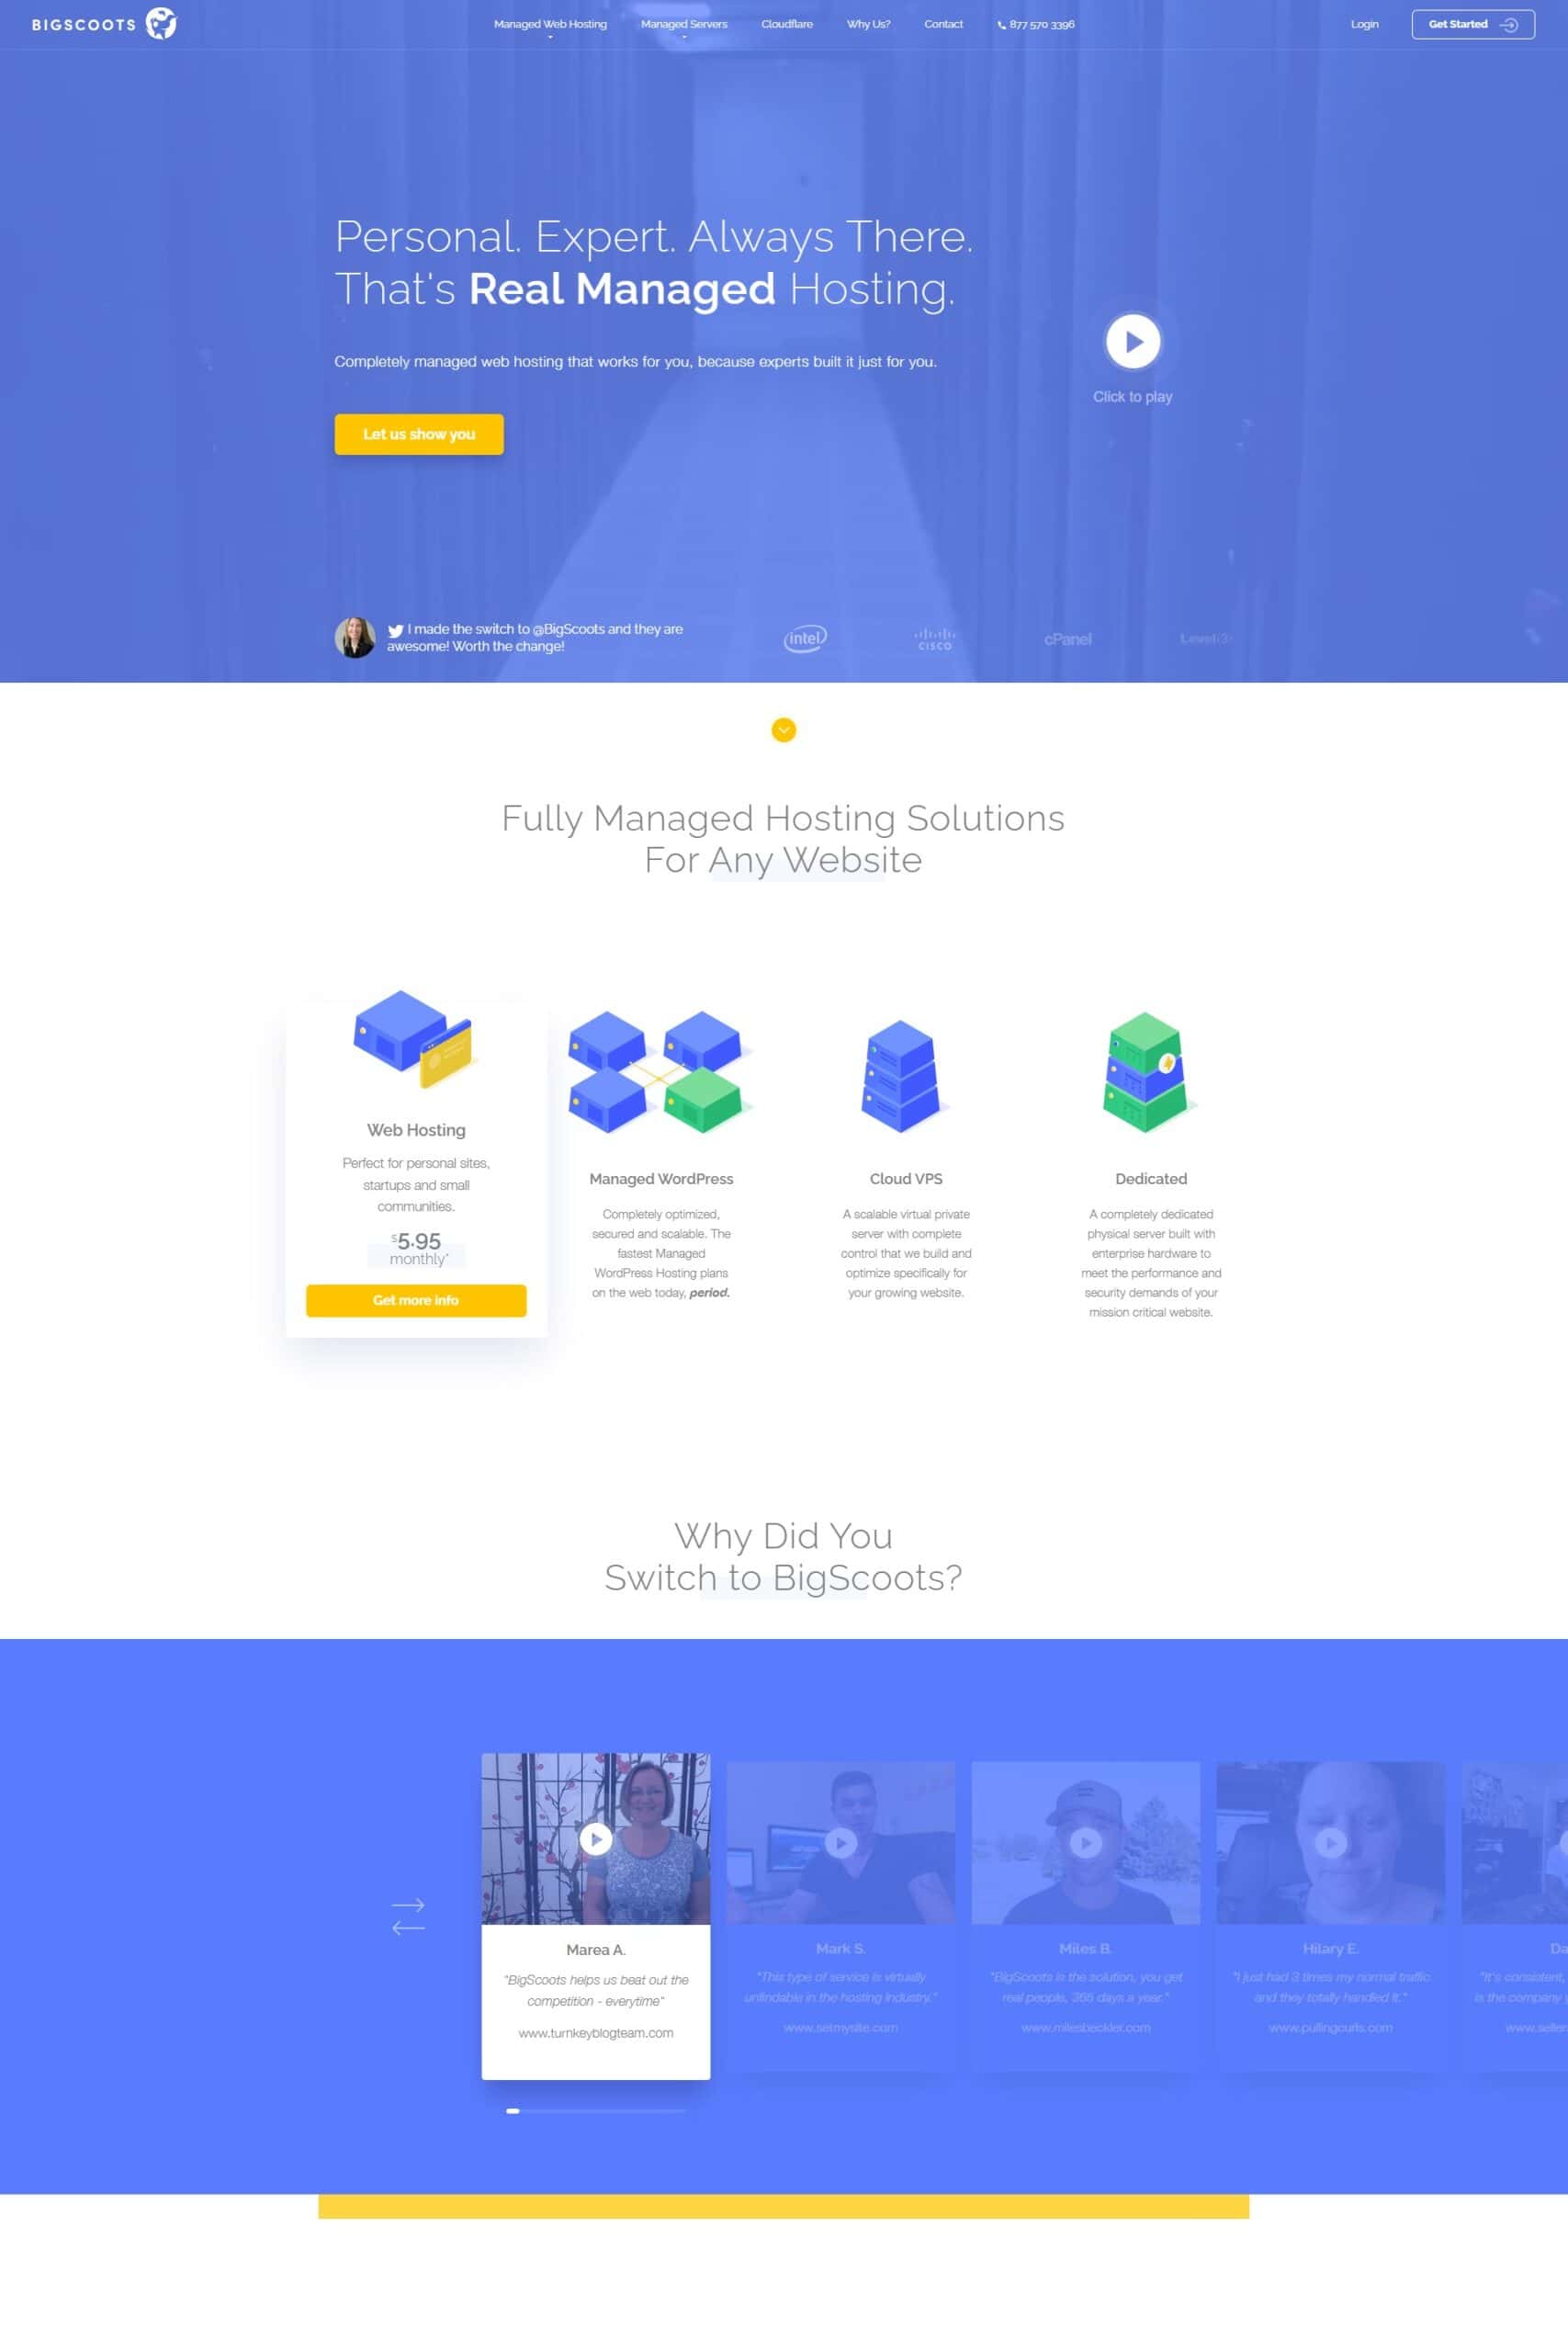
2. Choose your host
While it’s called ‘self-hosted’, the first thing you need to do if you want to start a self-hosted blog is to choose a ‘host’. Confusing, I know.
Your ‘host’ is essentially where your blog lives. There are hundreds (if not thousands) of hosting companies. Well-known hosts include names like: SiteGround, Bluehost and BigScoots.
If you are not sure which host to choose, I recommend reading this post: Which is the best hosting company? Where I compare two of the most popular hosts, SiteGround and BigScoots (as well as sharing some of my experiences with BlueHost!)
3. Select your plan
Most hosts have different ‘hosting plans’ at different price points.
As you are starting a brand new blog, I recommend you buy the cheapest plan to start with. Usually the cheapest plan is more than sufficient for a new blog and, in any case, you can always upgrade at a later date, when you need to.
However, one thing to watch out for is to ensure that an SSL certificate is included. An SSL certificate is the thing that makes your website https (as opposed to http). These days having https is essential, so you should always ensure your hosting plan includes an SSL certificate.
Expect to pay £3 to £8 per month for basic hosting for a new blog.
4. Choose your domain name
Next you need to choose a domain name (i.e. your website’s address – for example the domain name of this blog is easypeasyfoodie.com) for your site.
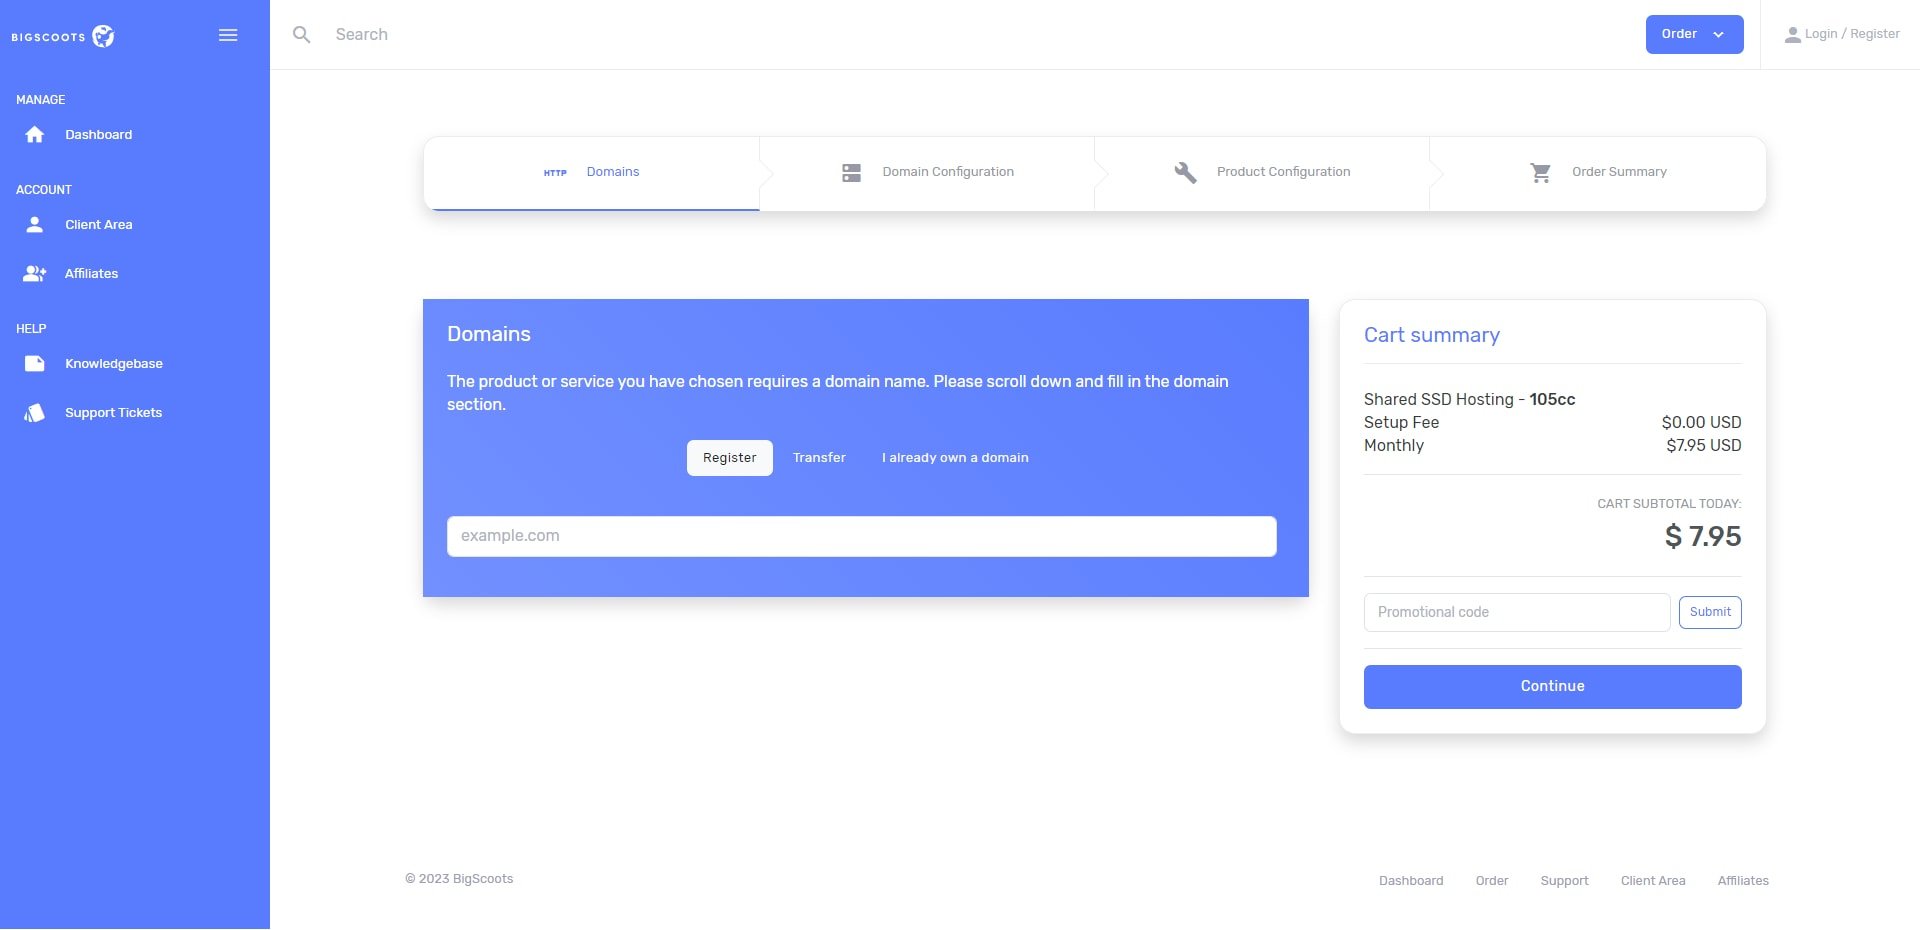
Think very carefully about this – you will be using this for a long time! (It is possible to change later, but it’s a pain.) Take a look at this post for more detailed help choosing a domain name: How to choose the perfect blog name
Type in your chosen domain name and see if it is available. If it is available, click register.
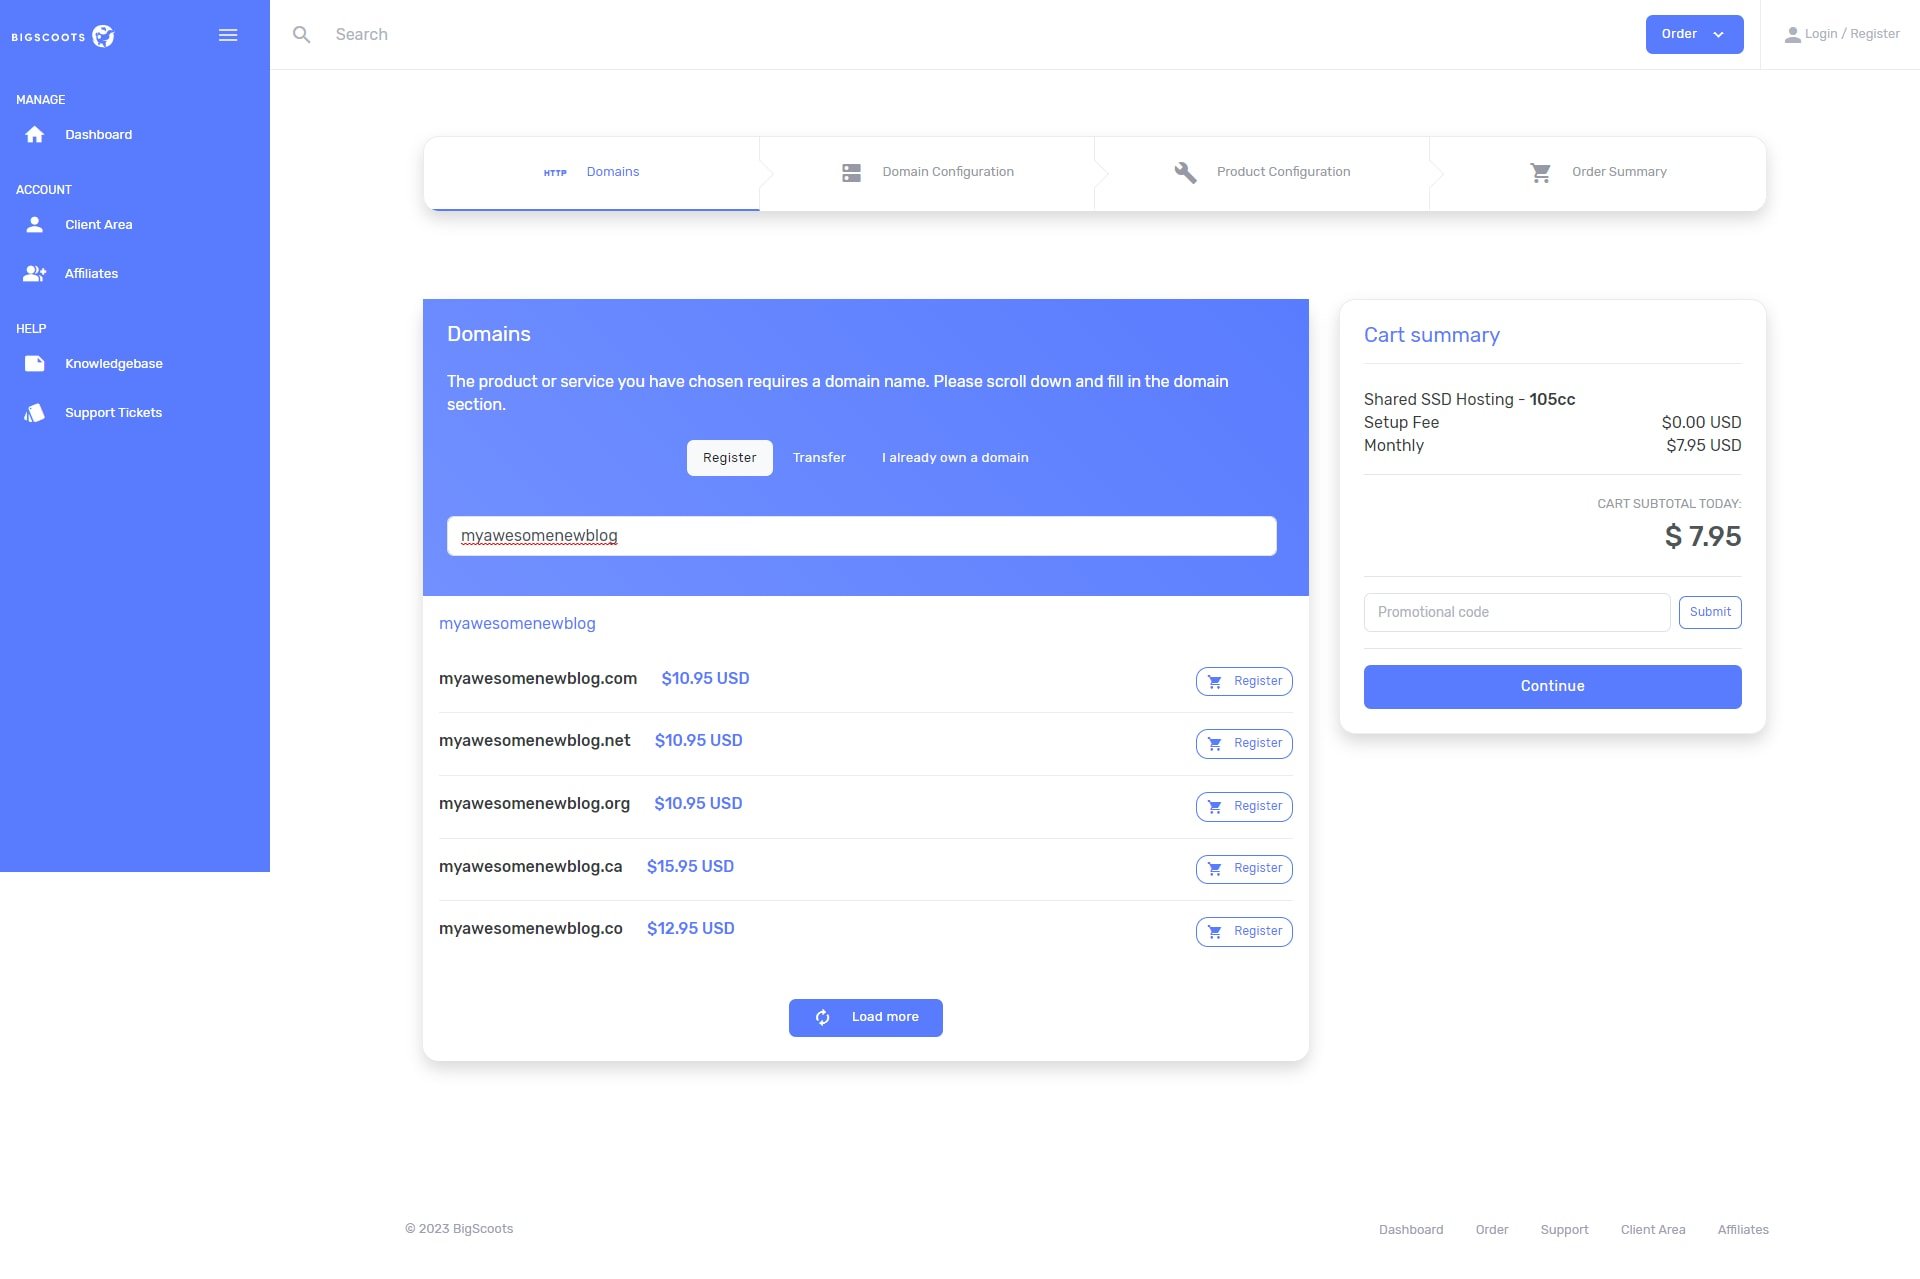
If it’s not available, keep trying until you find a domain name that is available!
NOTE: I highly recommend getting a .com ending as it does not limit you to a single country (I know many UK bloggers who wished they had started out with .com rather than .co.uk) and looks more professional than something like .biz or .blog
5. Fill in your personal information
Now you just need to fill in your details and hit ‘Checkout’.

6. Install WordPress
The next step is to install WordPress on your new blog. This is normally very simple and straightforward. Just follow the instructions your hosting company gives you.
Here’s an example…

7. Log in to WordPress
Once you have installed WordPress, you will need to log in to your WordPress site. Navigate to yourdomain.com/wp-admin (replace ‘yourdomain.com’ with the name of your actual domain!) this will take you through to the WordPress login page, which will look like this…

Enter your WordPress username and password (which you should have set up when you installed WordPress), then click ‘Log In’. You will now be looking at the WordPress dashboard, which will look something like this…

This is where you will control everything to do with your WordPress site, such as creating pages, writing posts, and changing the appearance of your blog.
Bloggers call this the ‘back end’. (The ‘front end’ of your blog is the bit your readers see.)
Congratulations!
Congratulations! You have just started your first food blog. But there are still a few things you need to do to set up your blog before you can start publishing blog posts.
You will need to:
- Choose and install a theme
- Create a logo for your new website
- Install plugins
- Write your essential pages, such as your ‘About Me’ page and your Privacy Policy
- Set up your menus
- Set up your side bar
- Edit your permalink structure
If you would like a step-by-step guide to help you with this and take you through everything you need to do to start your blog and get it ready to start publishing your first blog post (and then what to do next!), you might like to check out my free 7 week plan: How to start a profitable blog in 2026 – 7 week plan

Pin this post for later
Don’t want to miss a thing?
Follow me on Twitter, Facebook and Instagram. Or why not subscribe to my blog and get delicious, stress free recipes straight to your inbox every week?
Disclosure
This blog post contains affiliate links, this means if you click on a link and go on to buy the product I recommend, I will get a small commission, but you will not be charged a penny more – thanks in advance!
Jasmine says
I just started a food blog myself and this post has been a lifesaver! I wasn’t sure about going self-hosted at first, but you’ve convinced me to give it a go. Thanks
Eb Gargano says
Great to hear! You are very welcome 😀